BMP file
In this tutorial, you will learn about the way to display bmp images on a screen.
🔸Introduction
As mentioned before, BMP file is a raster image format and stores uncompressed image data. It is device independent and thus can be displayed on a small screen easily.
Each pixel on a bitmap contains a color value. There are two ways to store the color: indexed and RGB color.
RGB image
We have talked a lot about RGB images before. An RGB color image doesn't need a palette and stores true color values for each pixel. Red, green and blue are used to create extensive colors. 24-bit and 32-bit images are the most common nowadays, which use 8-bit to represent red, green, and blue.
Indexed image
An indexed color image has a color table or palette that stores the color value. Every single pixel stores an index used to get color from the palette. In this way, the image takes up smaller storage and can transfer faster. There are usually 1-bit, 2-bit, 4-bit, 8-bit indexed images.
- 1-bit supports 2 colors for each pixel, often black and white. The early computers used this way to display graphics.
- A 2-bit image can have 4 color options for one pixel.
- A 4-bit image can have 16 color options for one pixel.
- A 8-bit image can have 256 color options for one pixel.
The image below shows how indexed images work. The original is a 24-bit RGB image. The others use indexed colors and are generated using photoshop. The 1-bit image has only black and white colors. The 2-bit one has two more colors: pink and dark green. The 4-bit and 8-bit ones contain more colors and thus are closer to the original.
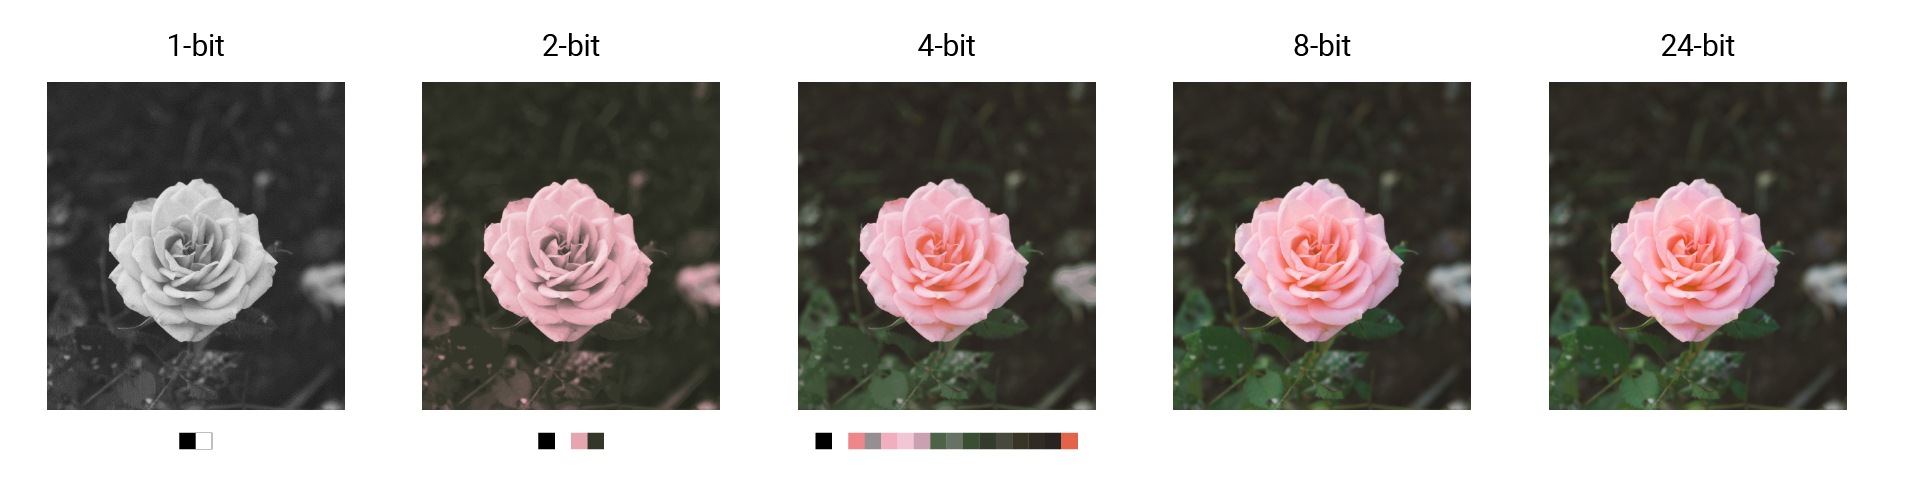
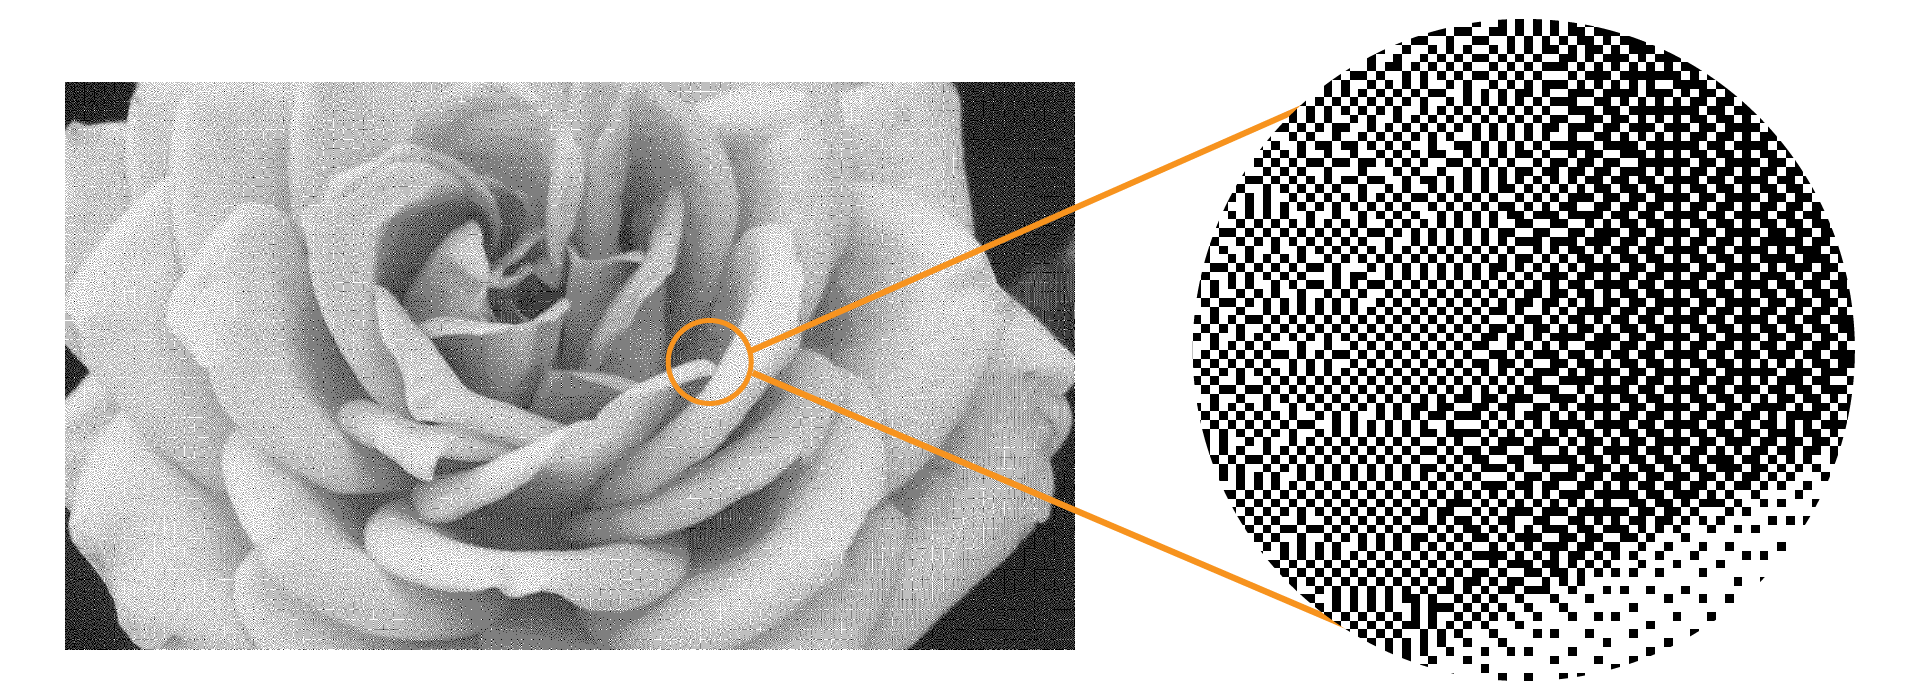
You may find there are some gray scales in the 1-bit image above. That's due to a technique called dither. It mimics different colors by mixing pixels of given colors. Different densities of two colors create illusions of other colors to our eyes. With this technique, you could create images with limited colors.
After you enlarge that image, you will see only black and white are used.
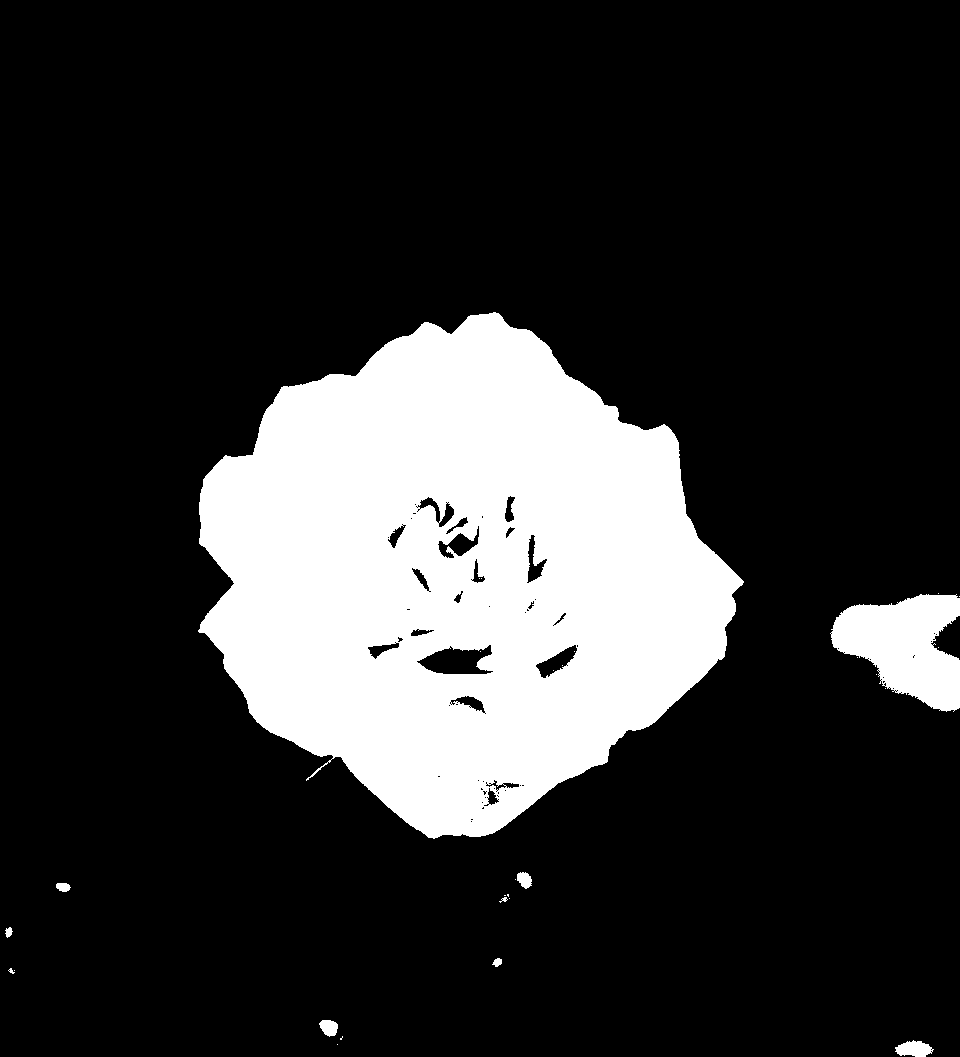
If the image is turned into 1-bit indexed color without using dithering, it will be as follows:
It should be not so difficult if you have understood how bitmap, palette, and tile work in the library MadDisplay.
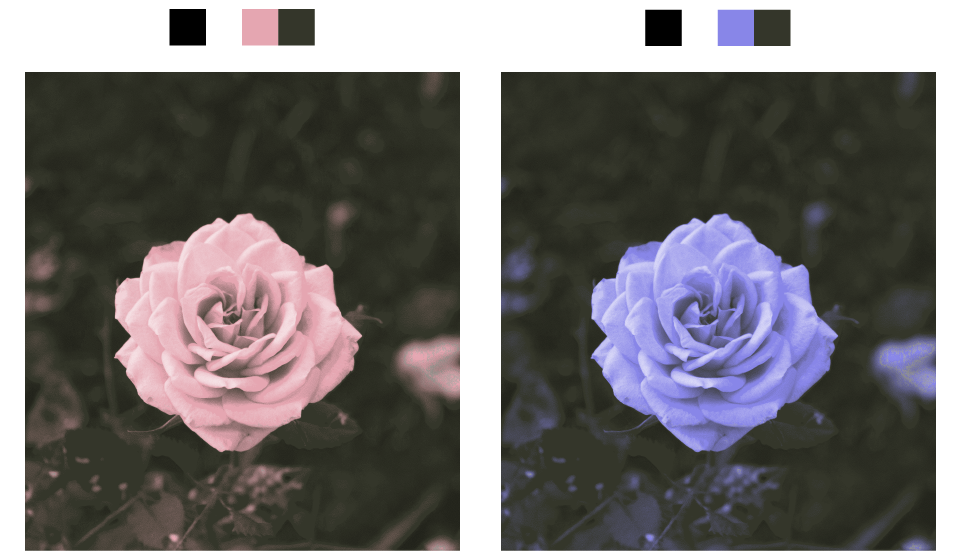
You can easily change how indexed images look by changing their palette. As you can see below, the flower changes from pink to purple after changing the palette.
Nowadays, indexed images are not widely-used, but you can still create them using Adobe Photoshop or Aseprite.
Class
BMP - display a bmp image on a screen.
| Method | Explanation |
|---|---|
init(path:transparentColor:) | Initialize a bitmap by indicating the path of the image on the SD card. It will open the file and read the data. Parameters: - path: the path of image stored on SD card. - transparentColor: a color used as transparent color. |
getBitmap() -> Bitmap | Get pixel information from the image. Return value: If it's an indexed image, it will get the indexes. If it's a RGB image, it will read the color values. |
getPalette() -> Palette? | Read palette from an indexed image. Return value: An RGB image doesn't have a palette, so it returns nil. An indexed image will return a palette. |
Please make sure to copy the images to the SD card so that your board can read it. And the image should be within 240x240 pixels to fit the screen.
🔸Projects
1. Display indexed bitmap
Let's start with an indexed image.
// Import the SwiftIO library to set SPI communication and MadBoard to use pin id.
import SwiftIO
import MadBoard
// Import the driver for the screen and graphical library for display.
import ST7789
import MadDisplay

// Initialize the pins for the screen.
let spi = SPI(Id.SPI0, speed: 30_000_000)
let cs = DigitalOut(Id.D9)
let dc = DigitalOut(Id.D10)
let rst = DigitalOut(Id.D14)
let bl = DigitalOut(Id.D2)

// Initialize the screen with the pins above and use it to create a instance for display.
let screen = ST7789(spi: spi, cs: cs, dc: dc, rst: rst, bl: bl, rotation: .angle90)
let display = MadDisplay(screen: screen)

// Read the bmp file on the SD card.
let bmp = BMP(path: "/SD:/indexedImage.bmp")
// Get the bitmap and palette info.
let bitmap = bmp.getBitmap()
let palette = bmp.getPalette()!

// Create a tile with the bitmap and palette above and add it to a group to show on screen.
let tile = Tile(bitmap: bitmap, palette: palette)
let group = Group()
group.append(tile)
display.update(group)

while true {
    sleep(ms: 1000)
}
- First off, you need to tell your board where the image is stored. If it's in the root directory of the SD card, the path is
/SD:/xxx.bmp. - As it is an indexed image, you need to get its bitmap and palette. Don't forget the palette needs to be unwrapped. Since this image must have a palette, you can force unwrap it.
- Then you create a tile with the bitmap and palette. Add the tile to a group and display it.
Here is a sample indexed image.
2. Display RGB bitmap
What about RGB images? Let's find out how to display them.
// Import the SwiftIO library to set SPI communication and MadBoard to use pin id.
import SwiftIO
import MadBoard
// Import the driver for the screen and graphical library for display.
import ST7789
import MadDisplay

// Initialize the pins for the screen.
let spi = SPI(Id.SPI0, speed: 30_000_000)
let cs = DigitalOut(Id.D9)
let dc = DigitalOut(Id.D10)
let rst = DigitalOut(Id.D14)
let bl = DigitalOut(Id.D2)

// Initialize the screen with the pins above and use it to create a instance for display.
let screen = ST7789(spi: spi, cs: cs, dc: dc, rst: rst, bl: bl, rotation: .angle90)
let display = MadDisplay(screen: screen)

// Get the bmp on the SD card.
let bmp = BMP(path: "/SD:/RGBImage.bmp")
// Get bitmap and
let bitmap = bmp.getBitmap()

let tile = Tile(bitmap: bitmap)
let group = Group()
group.append(tile)
display.update(group)

while true {
    sleep(ms: 1000)
}
- At first, you also need to initialize a BMP with its path.
- The bitmap stores the actual color value for each pixel, so it doesn't need a palette. Whether it's a 24 or 32 bit image, the color value will be calculated automatically into 16-bit for the screen.
- Create a tile with the bitmap and append it to the group for display.