Text
In this tutorial, let's see how to display text on a screen. You will display some specified phrases or sensor readings on a screen.
🔸Introduction
Label
The class Label provides you with an easy way to display text on a screen.
A label is a group that contains all characters of the text. Each character is a tile in the group.

When creating a label, you set its text, its position, color, scale and font. By default, a label doesn't have a background color. You can set it using updateBackgroundColor. The background is also a tile and will be added to that group.
You can display a label directly on the screen as it's a group. And it's better to take it as a subgroup and add it to a whole group so you can organize all contents better.
Class
Label - create a label to show text on a screen.
| Method | Explanation |
|---|---|
init(x:y:scale:text:color:font:) | Create a new label. Parameters: - x,y: the position of this label, the origin by default.- scale: the scale for the text, 1 by default which means original size. - text: the text what you want to display.- color: the color of the text, white by default.- font: the typeface of the text. There is a default font for all text. You can also load other pcf font. |
updateBackgroundColor(_:) | Set or change the color of the background box. Parameter: - newColor: a new color used to set the background color. |
updateText(_:) | Change the text to a new one. Parameter: - newText: text used to replace the original one. |
The coordinate you set when creating a new label is the position of the upper left corner shown below:

You can create different labels as below:
let label1 = Label(text: "Hello world!")
let label2 = Label(x: 10, y: 10, scale: 2, text: "Hello world!", color: Color.red)
Font
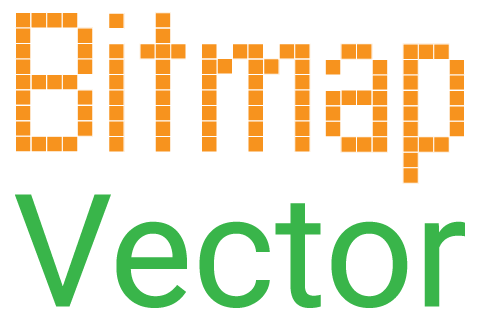
The fonts used for labels are bitmap fonts. These fonts define a matrix of pixels to show each glyph. You can regard it as a set of images. When displaying text, your board reads pixel info for each character. So it's suitable for text display on such a screen.
Besides, the texts on different websites are usually vector font. They use mathematical formulas to describe their look. As you zoom in or zoom out a webpage, the text will be resized without affecting its glyph. So far, we don't support it.
Built-in font
The fonts we talk about later are all bitmap fonts. MadDisplay provides two built-in fonts. All data of characters are already decoded, like the default font RobotRegular16. You can directly use them in your project.
You could use the other font ASCII8 as below:
let label3 = Label(text: "Hello world!", color: Color.lime, font: ASCII8())
However, its maximum height is 8 pixels, and you would find it too small for the screen. It is suitable for text display on an LED matrix.
The text itself cannot be enlarged since its font has decided the pixels for each character. But a label is a group, you can scale a group. So you can enlarge a label to make it take up more pixels. In this way, some characters may look a little strange.

PCF
You can also load other fonts from pcf (portable compiled format) files. It is a bitmap font format. Here is a guide to convert widely used fonts to pcf.
Class
PCFFont - load the font info.
| Method | Explanation |
|---|---|
init(path:) | Get the font info from the pcf font. Parameter: - path: the path of the font file stored on SD card. |
You can load the sample font NotoSansSC-Regular-16 as below:
let font = PCFFont(path: "/SD:/NotoSansSC-Regular-16.pcf")
let label4 = Label(text: "Hello!", font: font)
Don't forget to copy the pcf file into the SD card when you use it. After all, your board can only read the files on the card, not on your computer🤣. Then indicate its path when using it.
🔸Projects
1. Display text with built-in font
In this project, you will display several labels on the screen.

Example code
// Import the SwiftIO library to set SPI communication and MadBoard to use pin id.
import SwiftIO
import MadBoard
// Import the driver for the screen and graphical library for display.
import ST7789
import MadDisplay
// Import it to read temperatures.
import SHT3x

// Initialize the pins for the screen.
let spi = SPI(Id.SPI0, speed: 30_000_000)
let cs = DigitalOut(Id.D9)
let dc = DigitalOut(Id.D10)
let rst = DigitalOut(Id.D14)
let bl = DigitalOut(Id.D2)
// Initialize the screen with the pins above.
let screen = ST7789(spi: spi, cs: cs, dc: dc, rst: rst, bl: bl, rotation: .angle90)

// Initialize the I2C pin and the sensor to prepare for the temperature measurement.
let i2c = I2C(Id.I2C0)
let sensor = SHT3x(i2c)

// Create an instance for display using the screen.
let display = MadDisplay(screen: screen)
let group = Group()

// Create different labels and add them to the group.
let label1 = Label(text: "Hello!")
label1.updateBackgroundColor(Color.green)
let label2 = Label(y: 30, scale: 2, text: "Hello world!", color: Color.red)
let label3 = Label(x: 10, y: 80, text: "Hello!", color: Color.lime, font: ASCII8())

let value = sensor.readCelsius()
let label4 = Label(y: 120, text: "Temperature: \(value)")

group.append(label1)
group.append(label2)
group.append(label3)
group.append(label4)
display.update(group)

// Read the temperature and update the readings on the screen every second.
while true {
    label4.updateText("Temperature: \(sensor.readCelsius())")
    display.update(group)
    sleep(ms: 1000)
}
BTW, don't forget to add the dependency SHT3x in the file package.swift.
2. Display text using pcf font
In this project, you will load a font from a pcf file and use it to display text. Here is the sample font file.
Example code
// Import the SwiftIO library to set SPI communication and MadBoard to use pin id.
import SwiftIO
import MadBoard
// Import the driver for the screen and graphical library for display.
import ST7789
import MadDisplay

// Initialize the pins for the screen.
let spi = SPI(Id.SPI0, speed: 30_000_000)
let cs = DigitalOut(Id.D9)
let dc = DigitalOut(Id.D10)
let rst = DigitalOut(Id.D14)
let bl = DigitalOut(Id.D2)

// Initialize the screen with the pins above.
let screen = ST7789(spi: spi, cs: cs, dc: dc, rst: rst, bl: bl, rotation: .angle90)
let display = MadDisplay(screen: screen)

let group = Group()

// Create a label using the default font.
let text1 = Label(text: "Hello!")

// Load the font info from the pcf and use it to create a label.
let font = PCFFont(path: "/SD:/NotoSansSC-Regular-16.pcf")
let text2 = Label(y: 20, text: "Hello!", font: font)

group.append(text1)
group.append(text2)

display.update(group)

while true {
    sleep(ms: 1000)
}