1. Software prerequisite
At first, you could install the MadMachine extension for Visual Studio Code. It allows you to create a new project, compile and download it to your board.
We now support:
- macOS 13.0+
- Ubuntu 22.04 and 24.04 (x64)
- Windows 11 (x64, with a bit of extra setup — more details coming soon)
1. Install USB-Serial driver
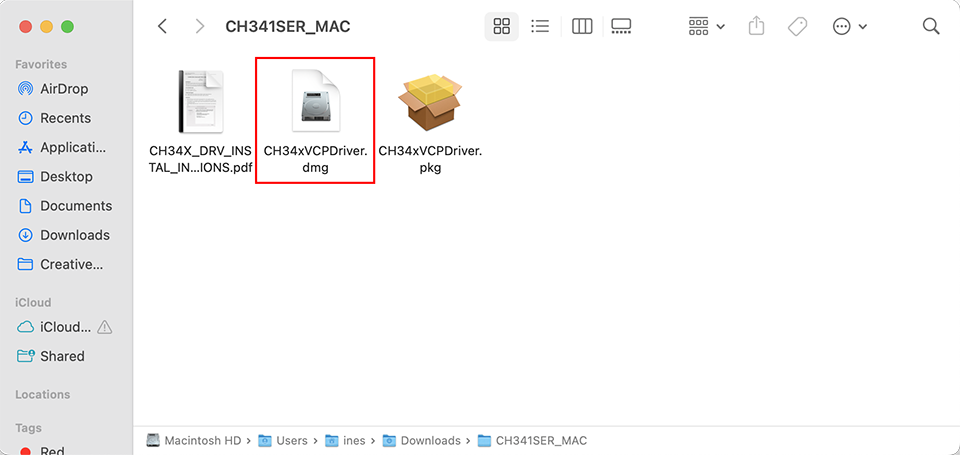
- Download the macOS driver and unzip it.
- Install the dmg format driver in the zip file.
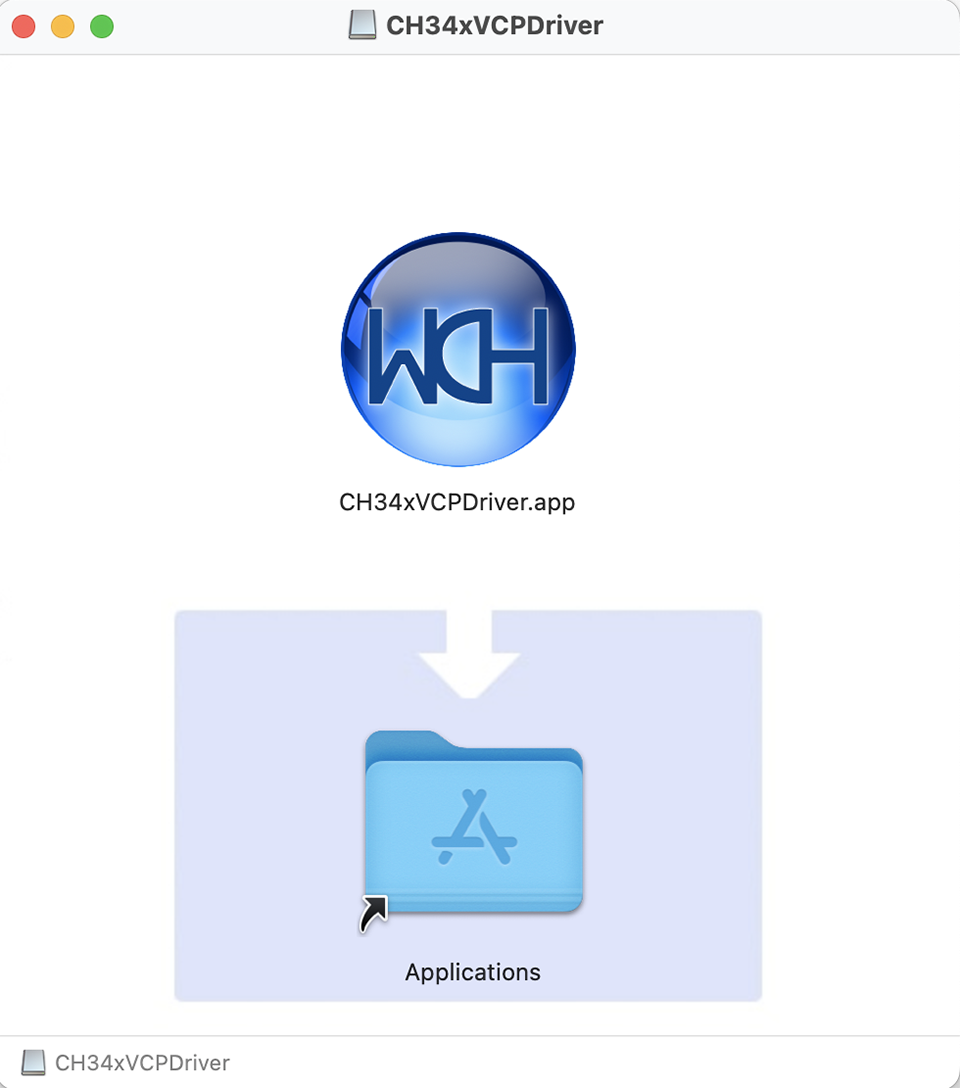
- Drag CH34xVCPDriver into Application folder.
-
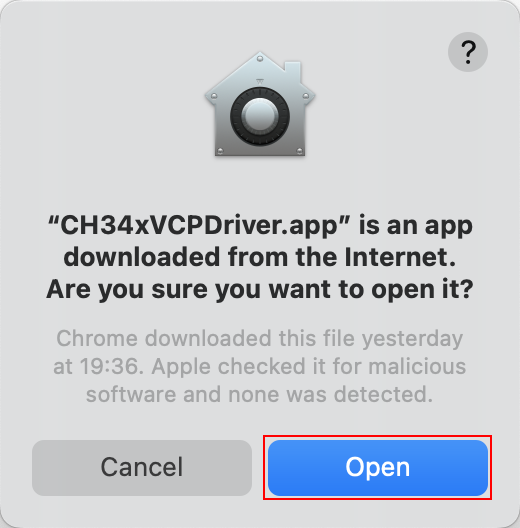
Open LaunchPad and open the CH34xVCPDriver app.
Click Open if there is a popup window.
-
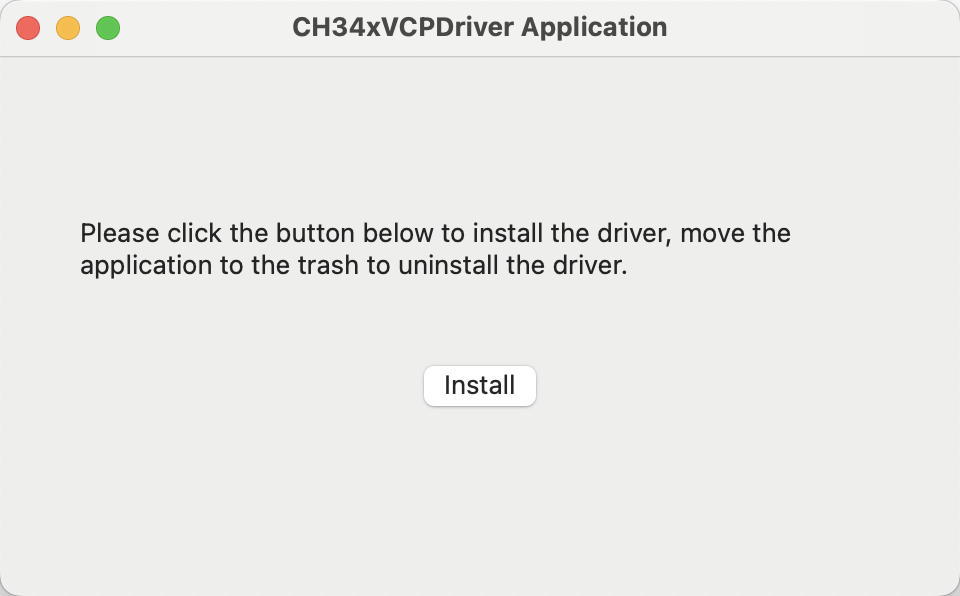
Click the Install button.
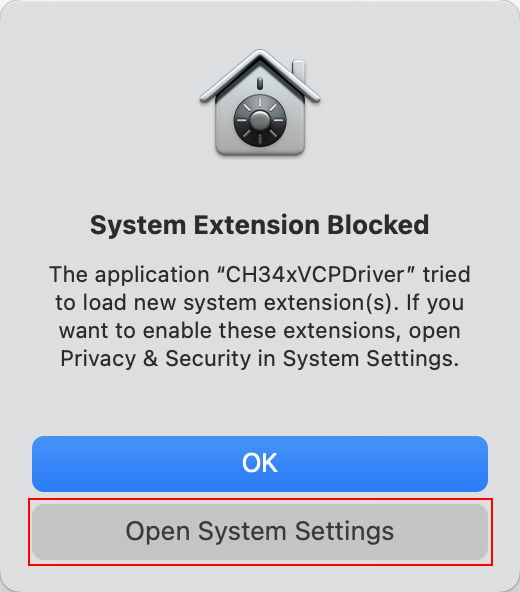
If there is a popup message saying System Extension Blocked.
Click Open System Settings button.
Click Allow.
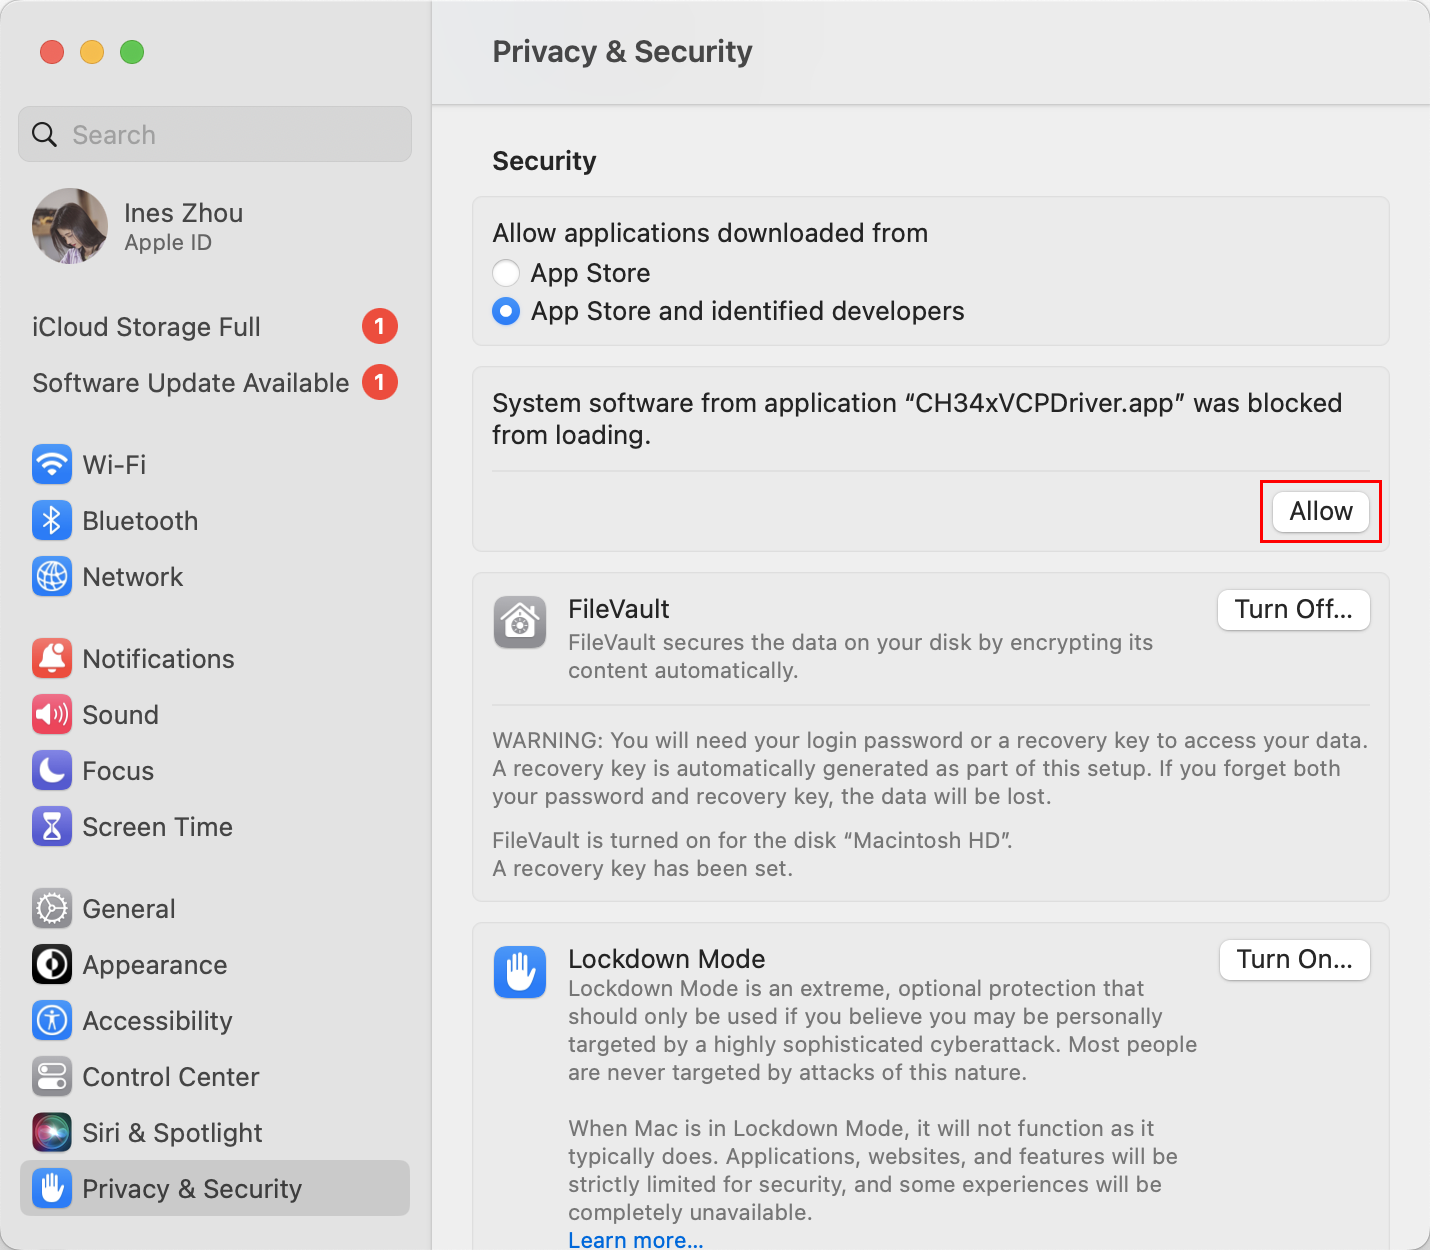
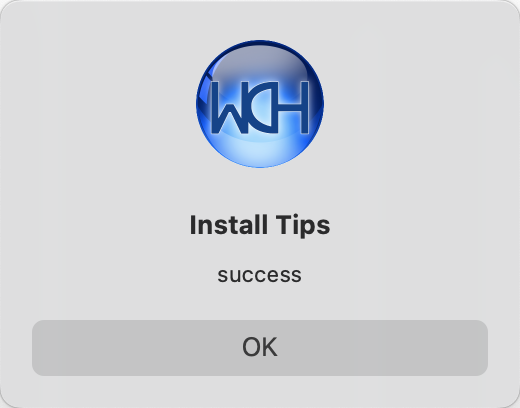
The driver is installed successfully.
- To uninstall the driver, remove the app to Trash.
- Restart the computer before reinstalling the driver.
After the driver is installed, you should see the port tty.wchusbserialx in serial monitor if you connect your board to the computer.
2. Download mm-sdk
Download the mm-sdk according to your operating system and unzip it.
3. Setting up the Swift development enviroment
- macOS
- Linux
Since the Swift toolchain included in Xcode doesn't contain the embedded libraries, you need to install latest Swift toolchain release from Swift.org
- Install required dependencies:
Ubuntu 22.04
sudo apt-get install \
          binutils \
          git \
          gnupg2 \
          libc6-dev \
          libcurl4-openssl-dev \
          libedit2 \
          libgcc-11-dev \
          libpython3-dev \
          libsqlite3-0 \
          libstdc++-11-dev \
          libxml2-dev \
          libz3-dev \
          pkg-config \
          python3-lldb-13 \
          tzdata \
          unzip \
          zlib1g-dev
Ubuntu 24.04
sudo apt-get install \
          binutils \
          git \
          gnupg2 \
          libc6-dev \
          libcurl4-openssl-dev \
          libedit2 \
          libgcc-13-dev \
          libncurses-dev \
          libpython3-dev \
          libsqlite3-0 \
          libstdc++-13-dev \
          libxml2-dev \
          libz3-dev \
          pkg-config \
          tzdata \
          unzip \
          zlib1g-dev
- Download the tarball package (.tar.gz) of the latest Swift toolchain release.
- Unzip the
.tar.gzfile — the extracted directory will be the Swift toolchain path.
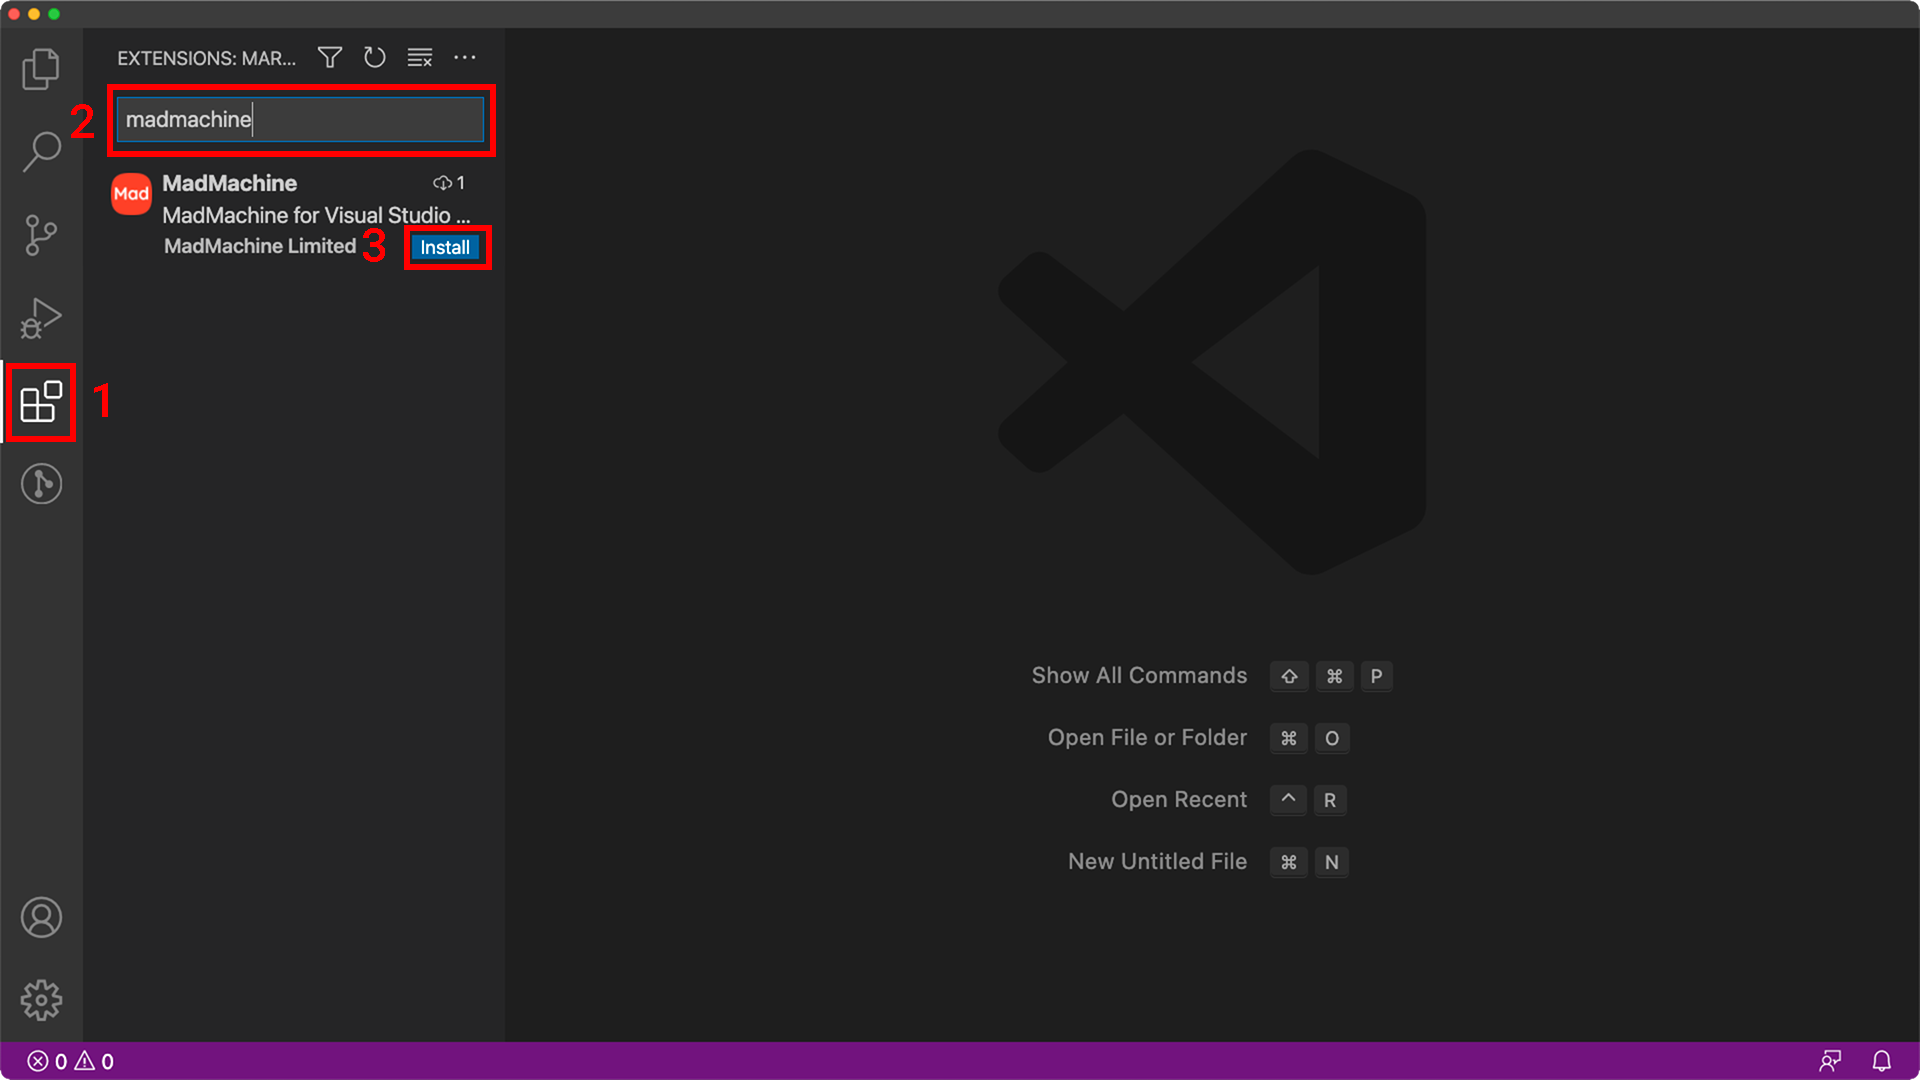
4. Install MadMachine extension for VS Code
- Open the Visual Studio Code. Click the Extension icon on the left activity bar.
- Enter MadMachine in the search box to find the extension in its marketplace.
- Click the Install button.
For advanced users, you could edit your code wherever you like and use the mm-sdk to compile your code.
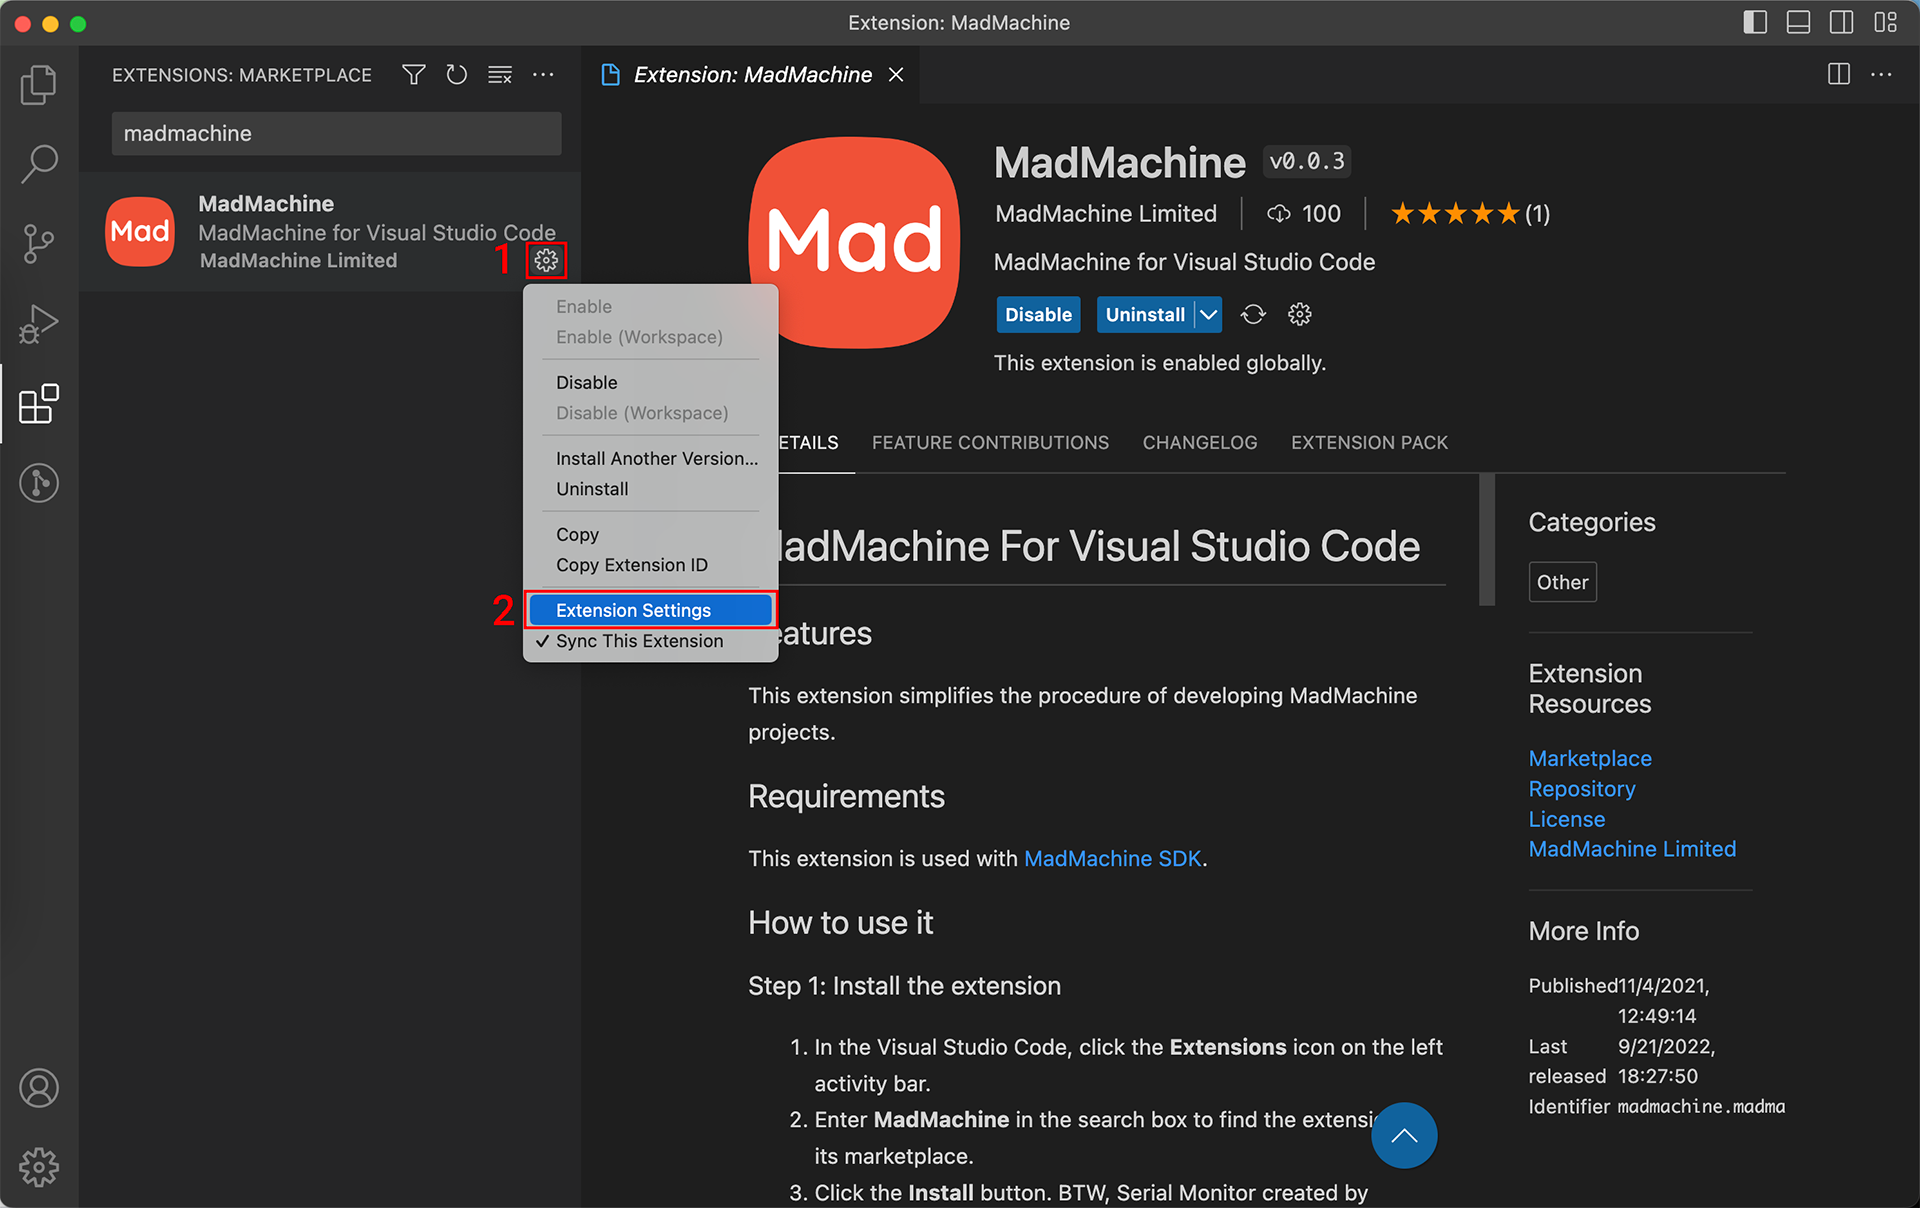
- Click ⚙️ / Extension Settings to open the settings.
The extension relies on the mm-sdk to do all its work. You need to indicate sdk's path before using the extension.
-
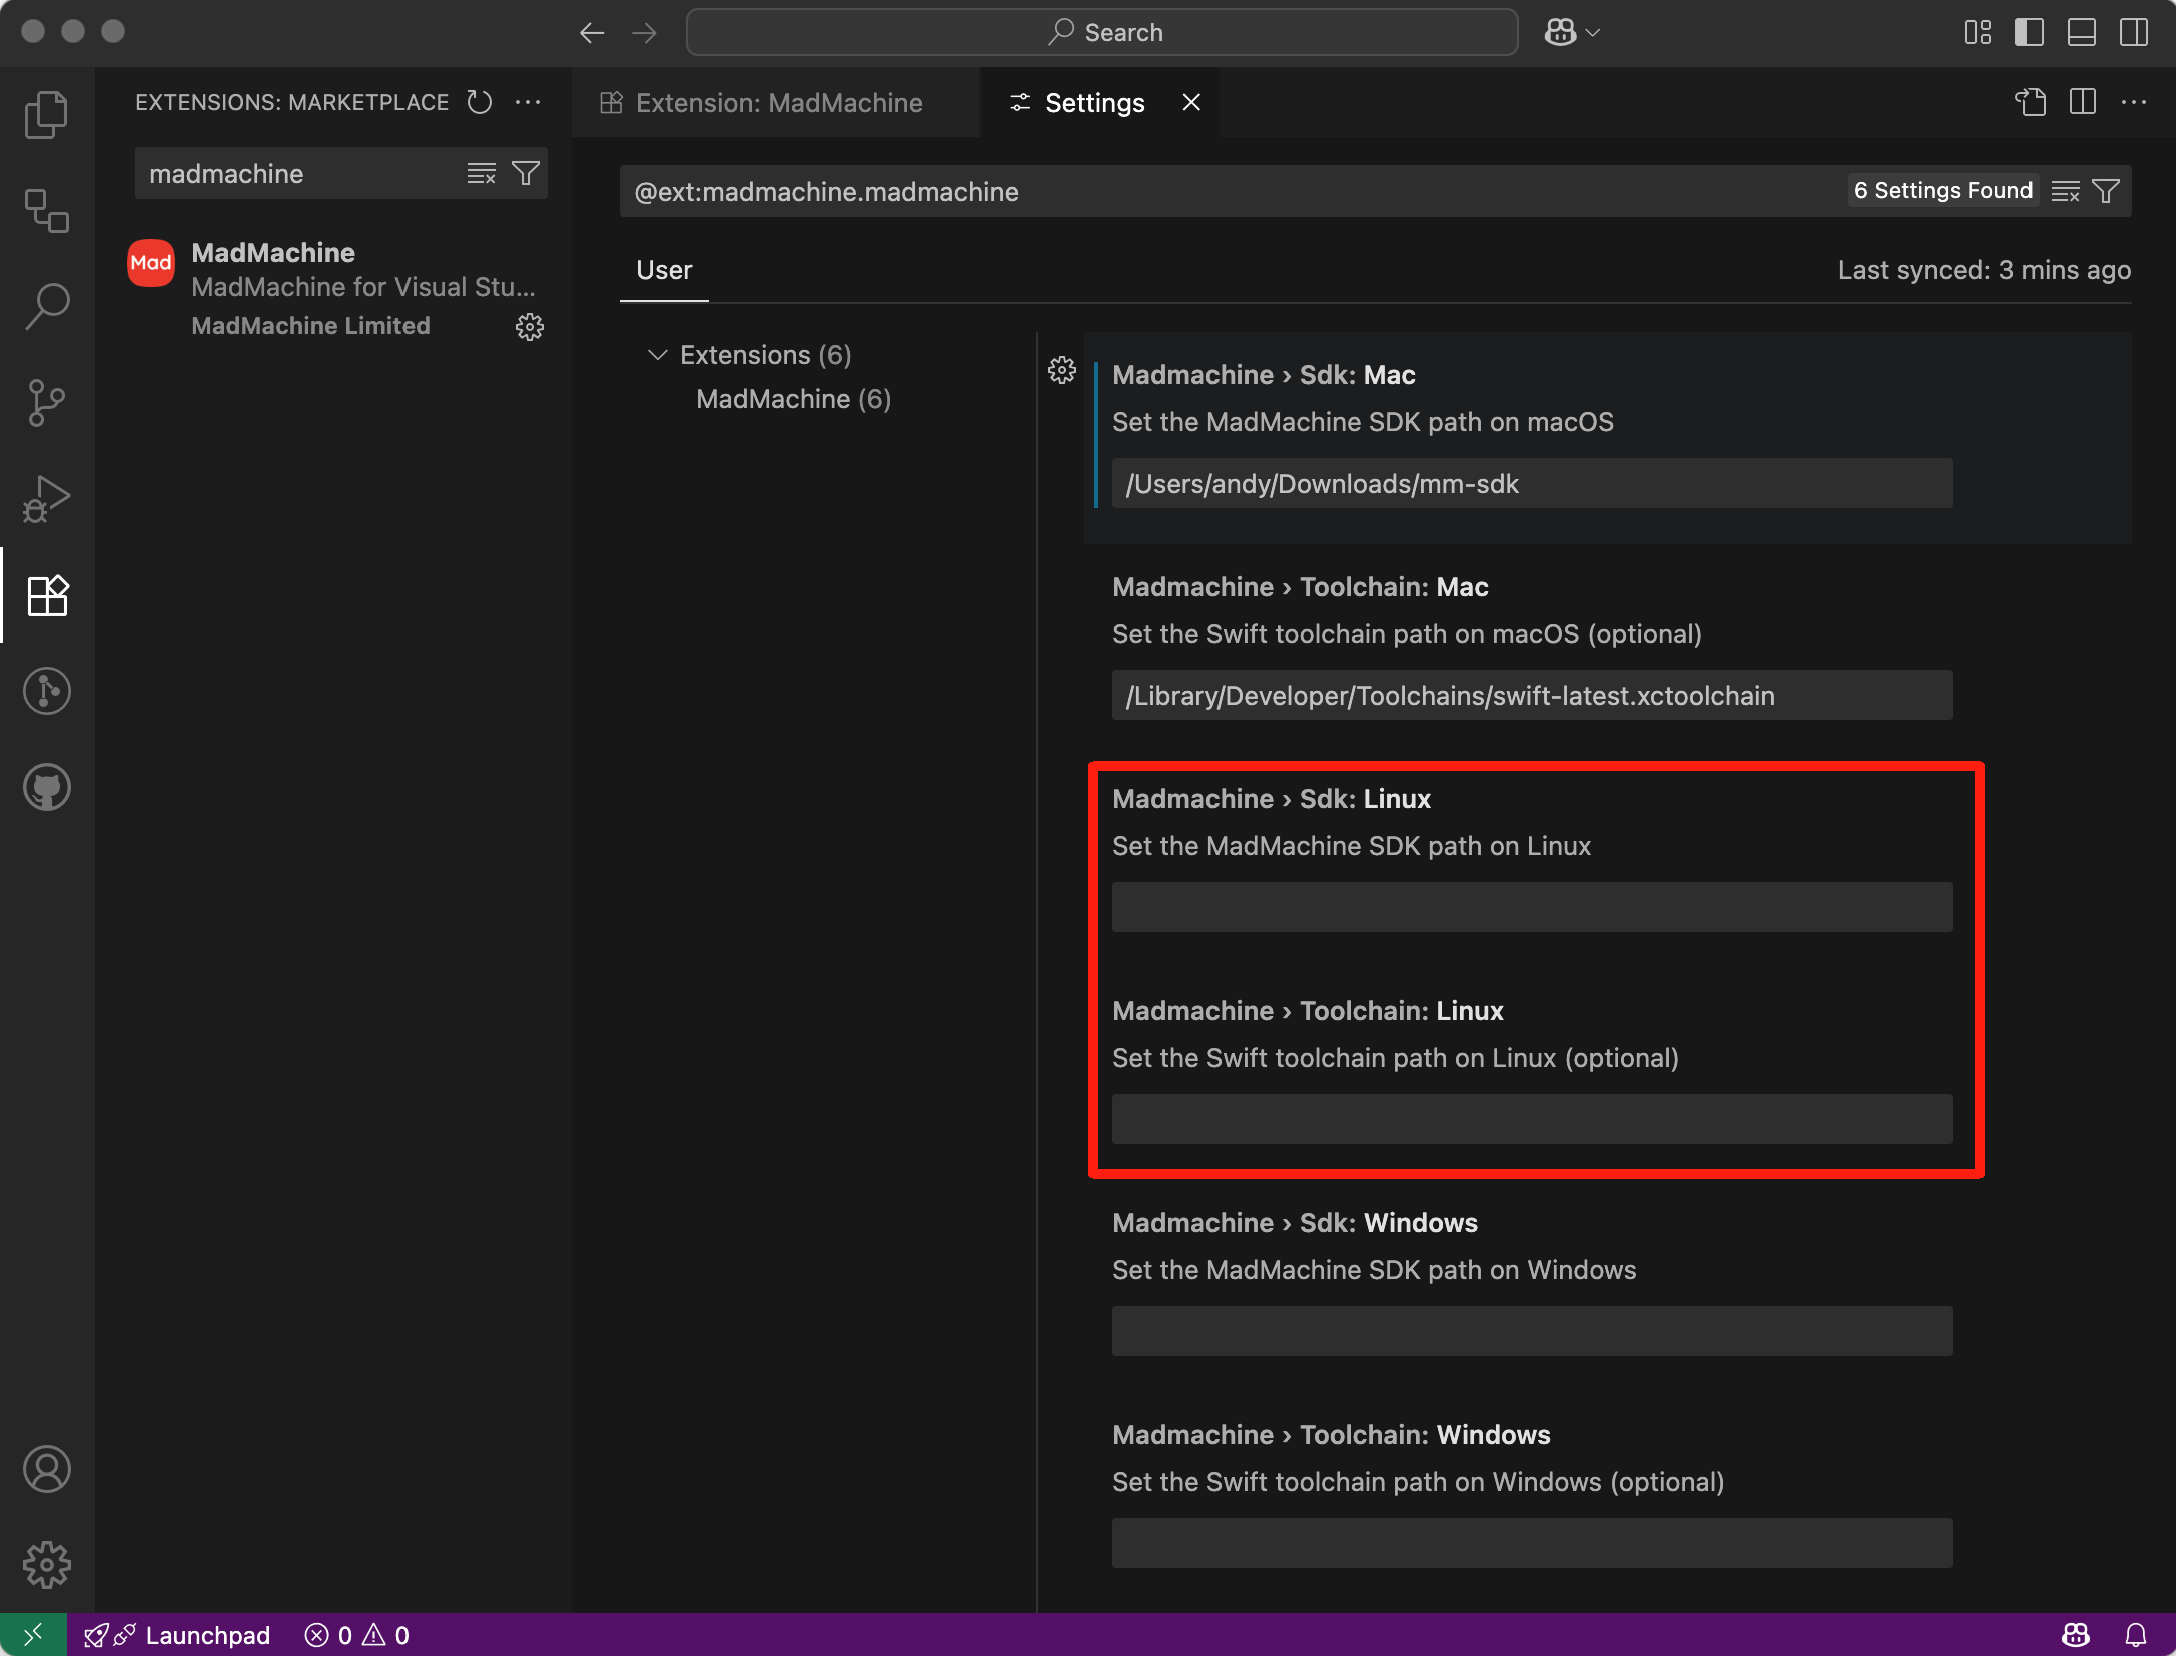
Enter the path of the sdk in the box that matches your operating system.
-
Enter the path of the Swift toolchain in the box that matches the location (optional,
/Library/Developer/Toolchains/swift-latest.xctoolchainis the default on macOS).- The
mm-sdkwill look for the Swift toolchian in the following order:- The toolchain path specified in the extension settings.
- The path set by
TOOLCHAINenviroment variable. - The default Swift toolchain path on your operating system.
- The
- macOS
- Linux
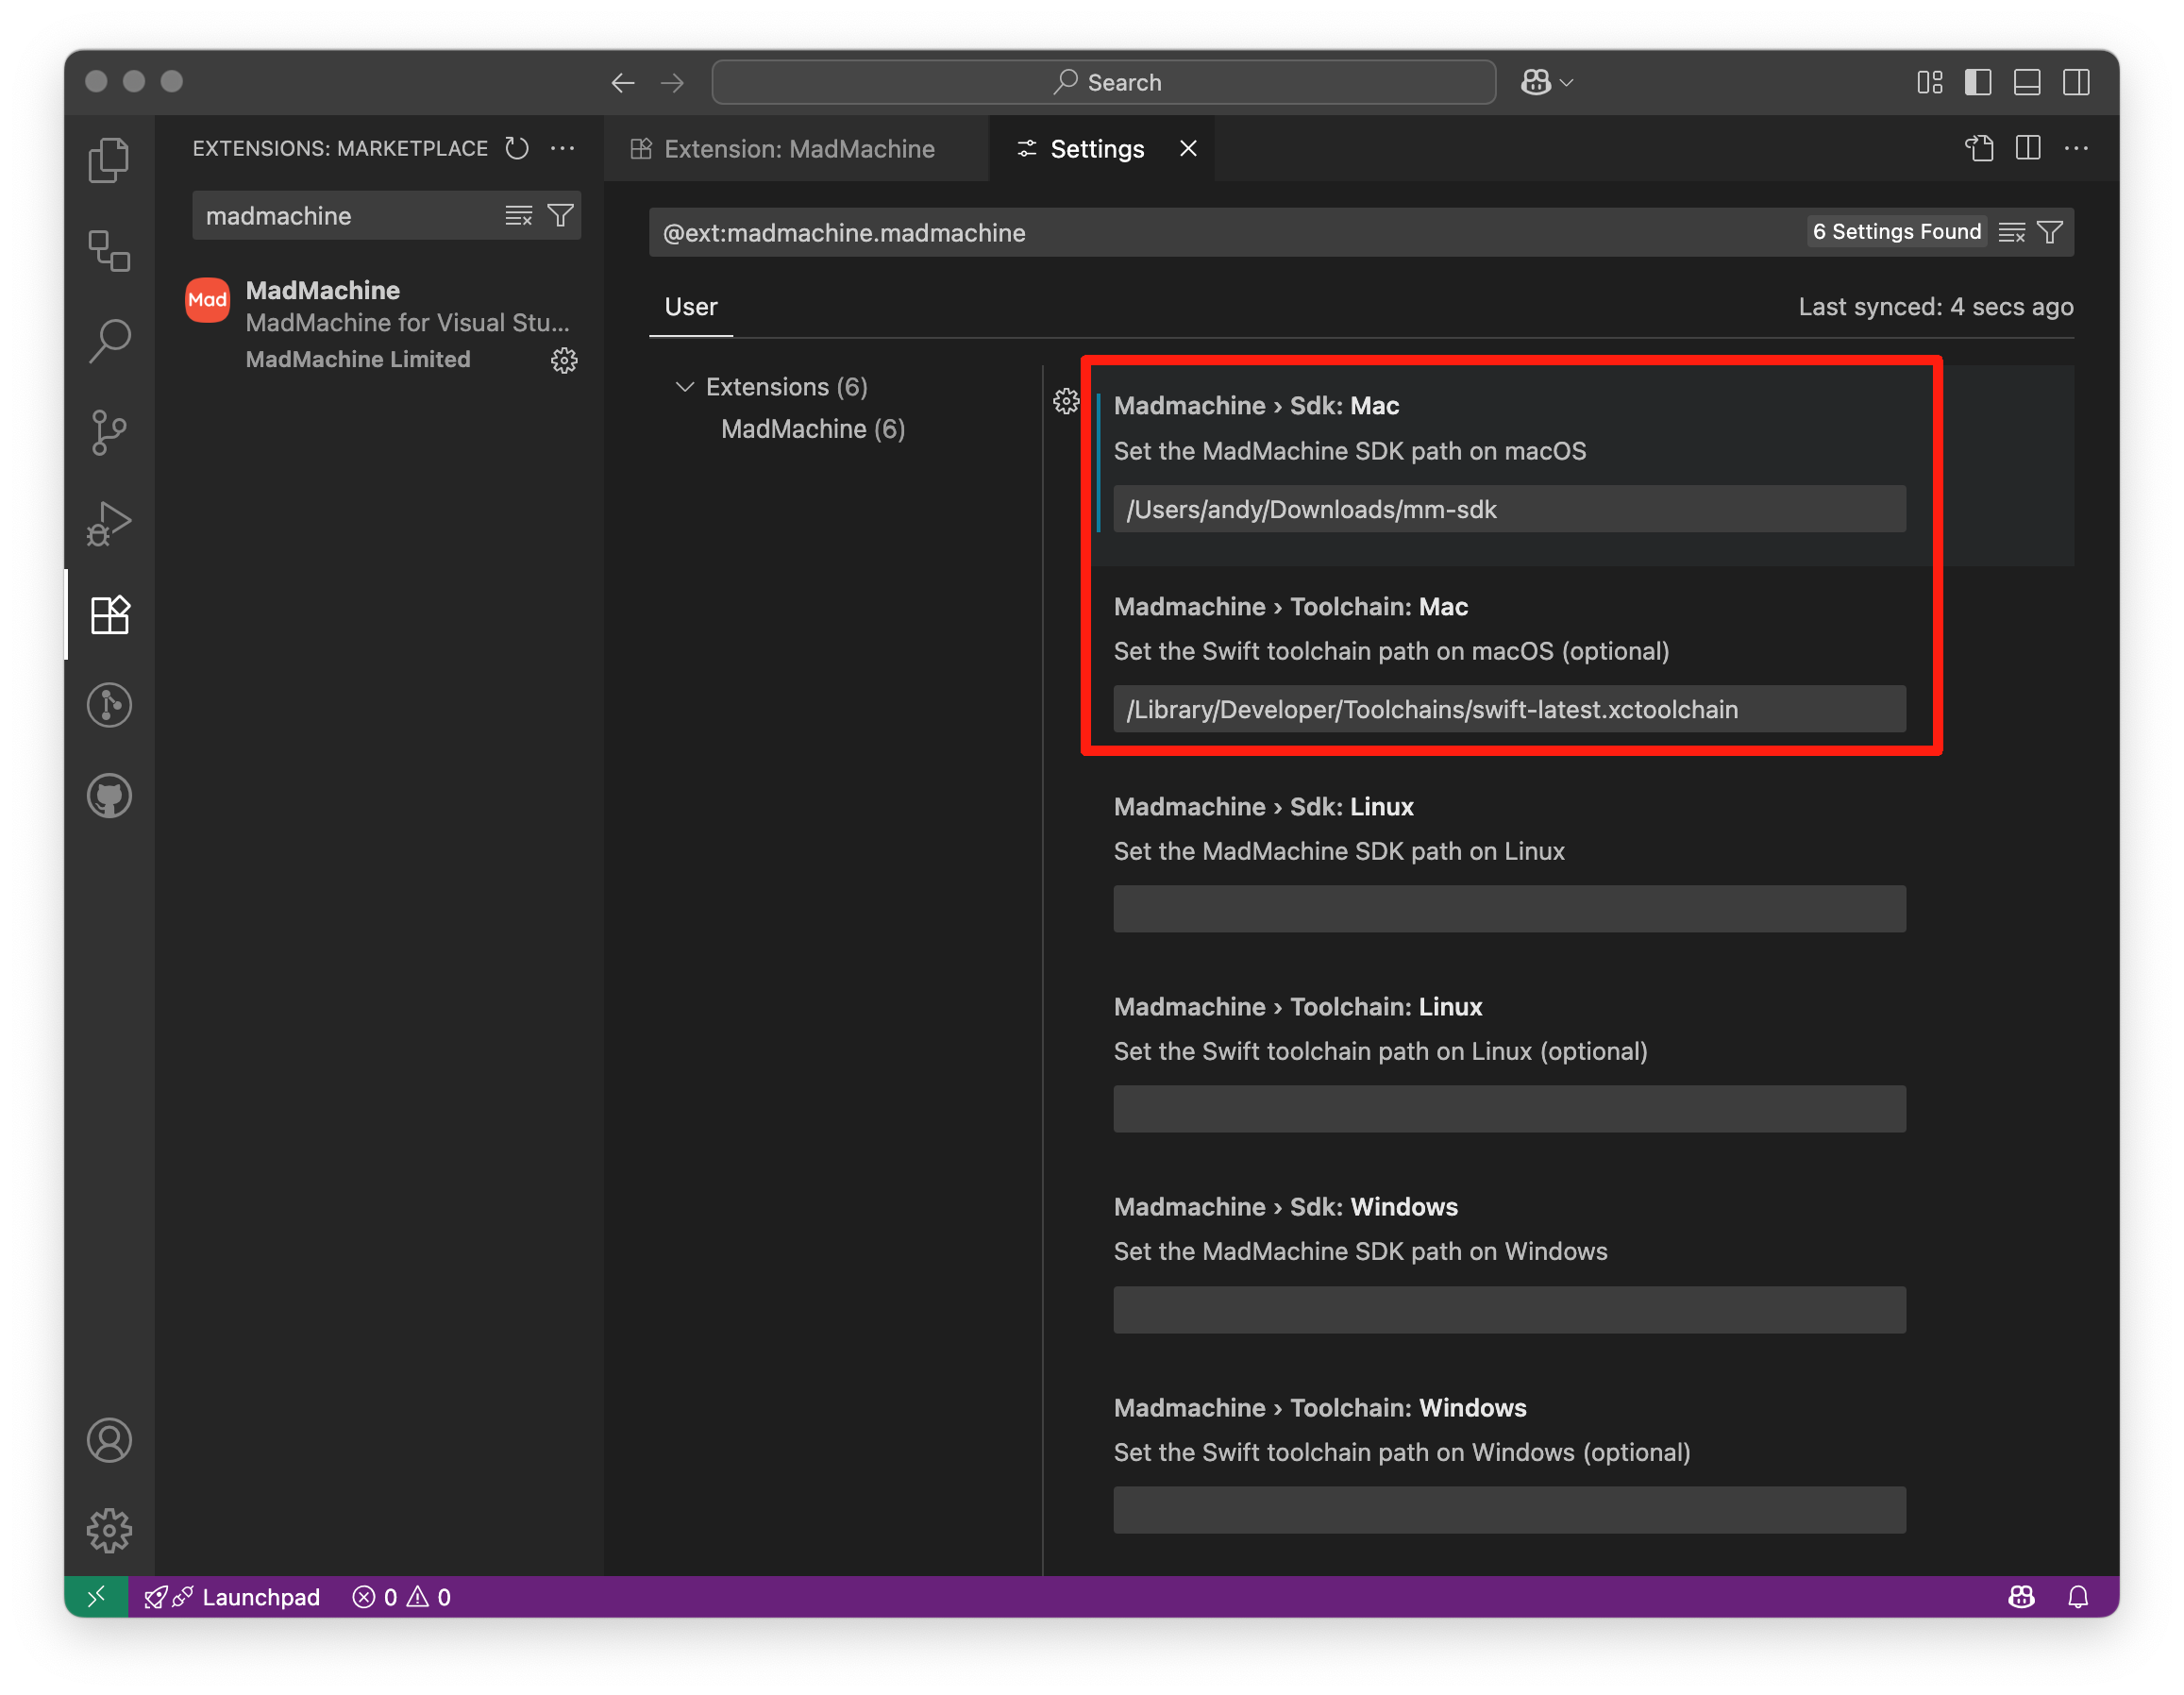
Make sure the sdk path is correct, or the extension won't work.
Now, the extension gets ready👏.
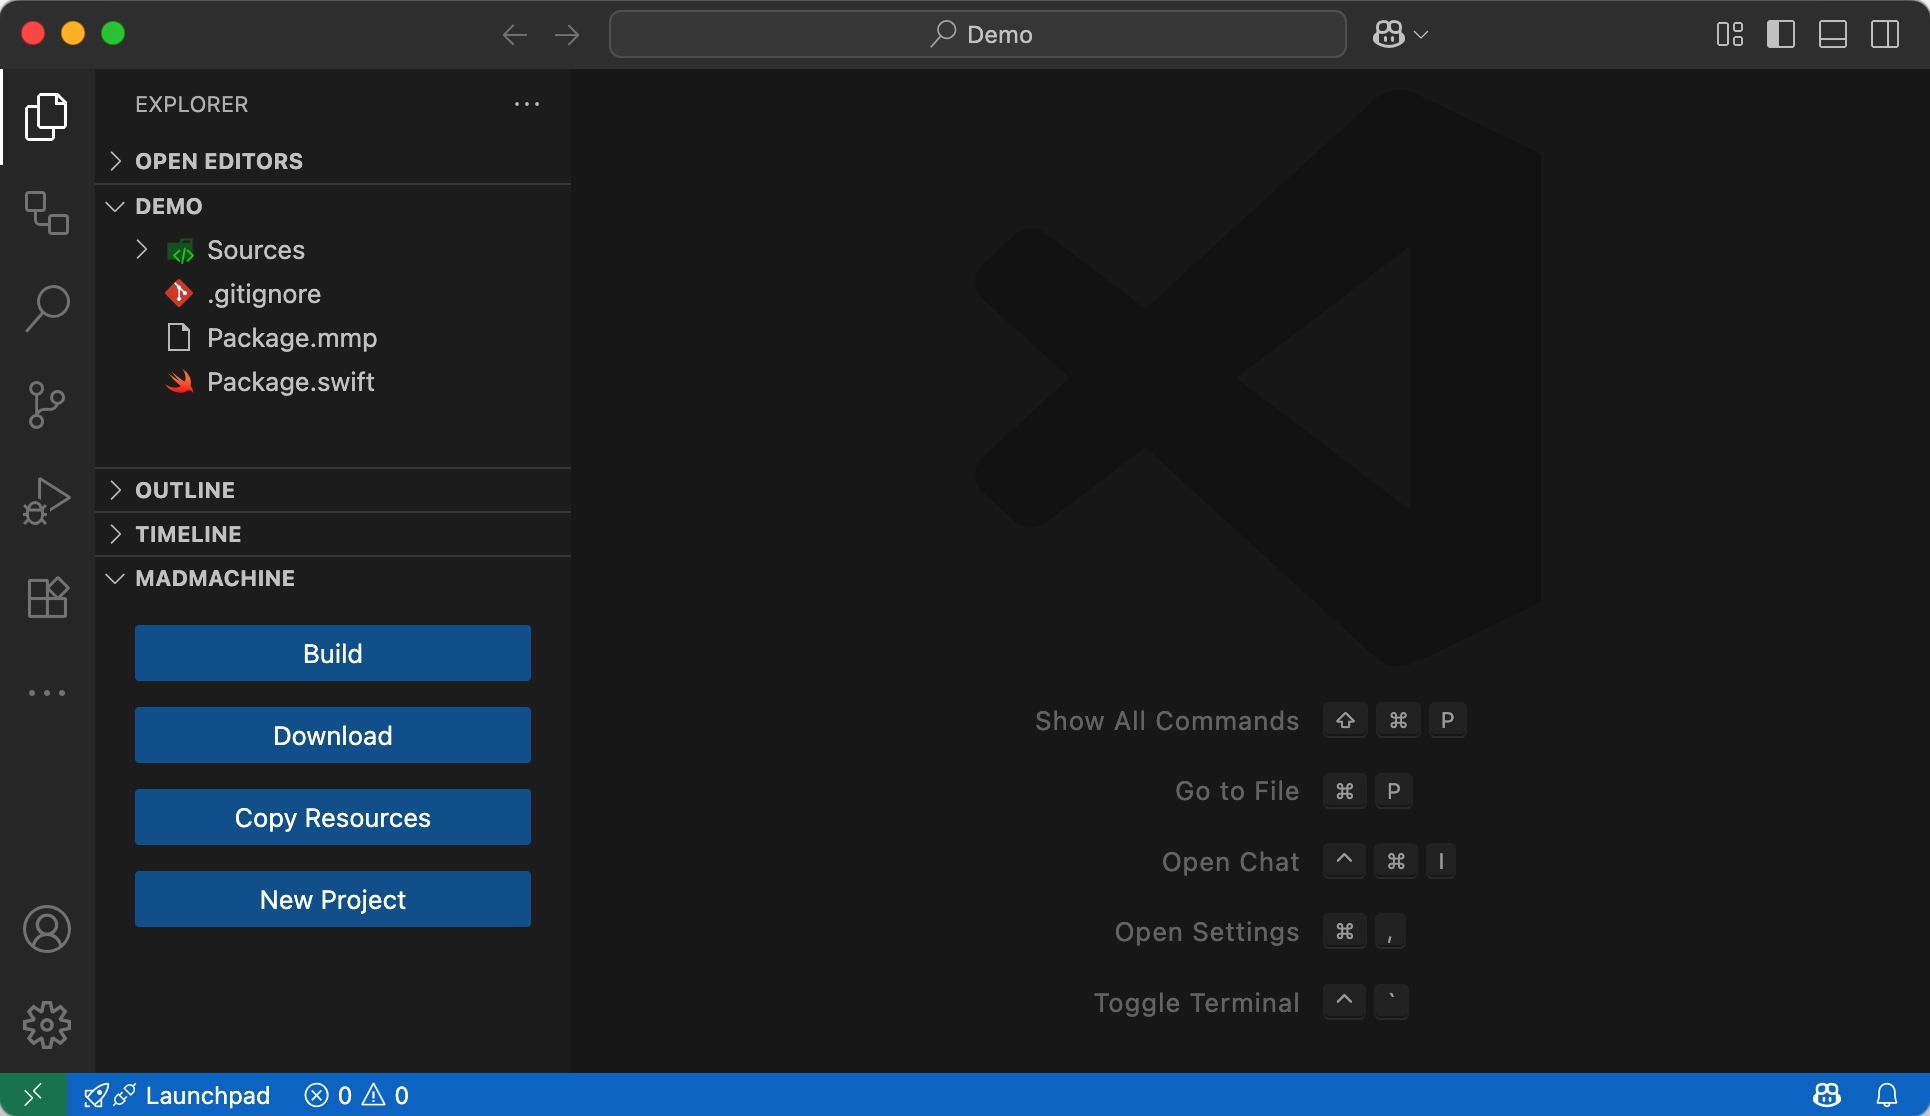
The extension is at the bottom of the Explorer panel. All you need for your project is these three buttons:
- Build: build your project after you finish the code. If there are any errors, you can modify your code according to the message in the terminal.
- Download: download the generated file after building your project.
- Copy Resources: copy the entire
Resourcesdirectory to the specified file system (Flash:/lfsor SD card:/SD:) - New Project: create a new MadMachine project. You will choose the project type and the board type.