Read analog input
So far, you've learned about digital signals. In this example, let's try analog signals. You'll turn a potentiometer to change the input. Your board reads its values and shows them on a serial monitor.
What you need
- SwiftIO Micro (or SwiftIO board)
- Breadboard
- Potentiometer
- Jumper wires
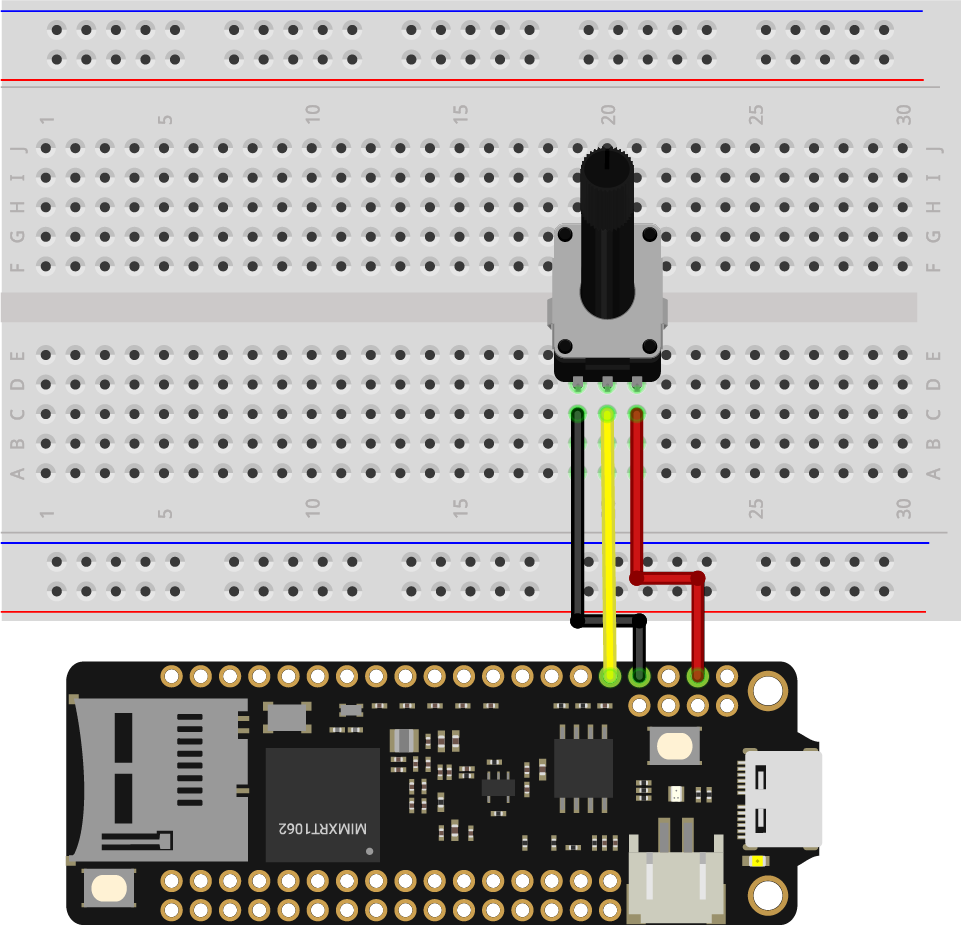
Circuit
Let's build the circuit now.
- Place the potentiometer onto the breadboard.
- Connect the first leg on the left to pin GND.
- Connect the second leg to pin A0.
- Connect the third leg goes to pin 3V3.
Example code
For the code, you will use the AnalogIn class.
Open the project ReadAnalogInput in the folder MadExamples/Examples/GettingStarted if you downloaded the examples.
// Read the input voltage on a specified analog pin. The value you get will be a decimal between 0.0 and 3.3.

// Import the library to enable the relevant classes and functions.
import SwiftIO
import MadBoard

@main
public struct ReadAnalogInput {
    public static func main() {
        // Initialize the pin A0 as an analog input pin.
        let pin = AnalogIn(Id.A0)

        // Read the input voltage every second.
        while true {
            // Declare a constant to store the value you read from the analog pin.
            let value = pin.readVoltage()
            // Print the value and you can see it in the serial monitor.
            print(value)
            // Wait a second and then continue to read.
            sleep(ms: 1000)
        }
    }
}
Background
Analog input
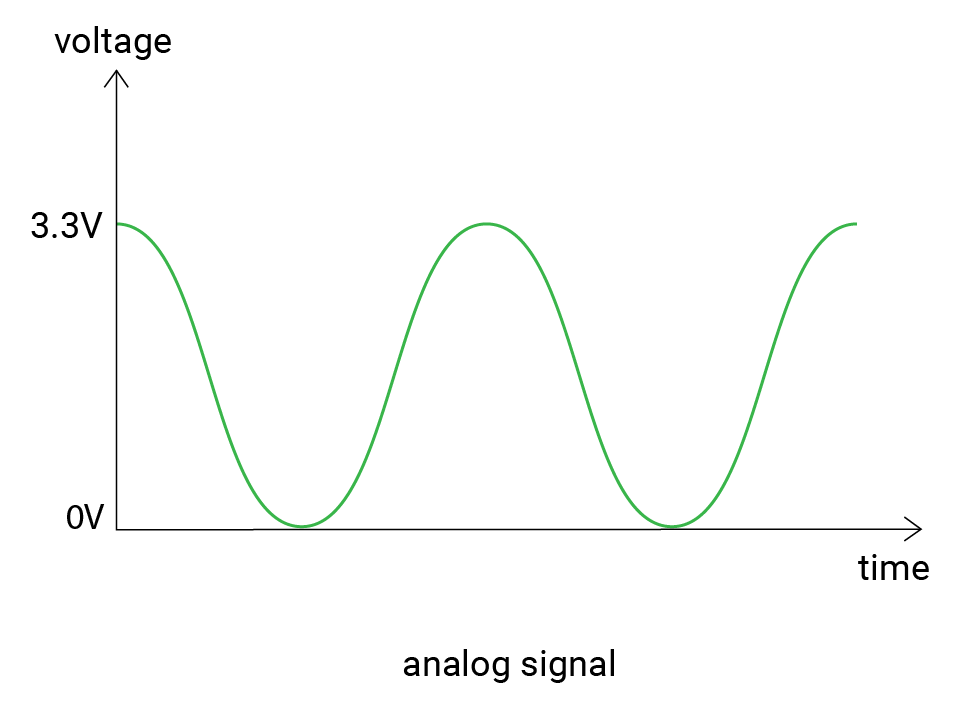
You have known that the digital signal has determined values, and the analog signal is quite different. Its voltage changes smoothly with time. And its value ranges between 0V and 3.3V. So you can get 1.5V, 2V, 2.75V... There can be infinite possible values.
So how does the board read the values? Here comes the analog to digital converter. In brief, it converts the analog voltage to a digital value that the microcontroller can read.
The converter has different precision, and the resolution describes the possible values it can measure. Our boards have a 12-bit resolution, which means there are 4096 (0-4095) values in total. The values from 0 to 4095 are known as raw values.
Let's see the working process in detail. When the board reads from the analog pin, it will first get a raw value between 0 and 4095, which will be mapped to the voltage value proportionally. Here is the formula:
resolution / reference voltage = raw value / actual voltage
where
resolution = 4096
reference voltage = 3.3V
For example, if the raw value equals 0, the voltage would be 0V; if the raw value equals 4095, the voltage would be 3.3V; and 2047 corresponds to 1.65V.
Potentiometer
The potentiometer is one kind of variable resistor. You could adjust its resistance by rotating it clockwise or anticlockwise.
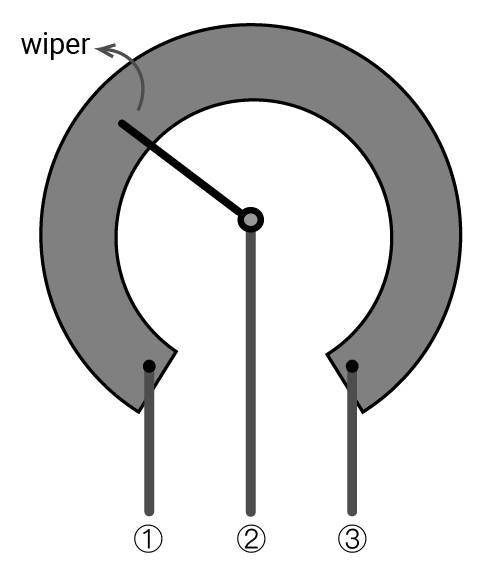
The resistance between ① and ③ is its maximum value. The wiper divides it into two parts. As the wiper moves, the resistance of the two parts will change accordingly.
Code analysis
import SwiftIO
import MadBoard
Import the SwiftIO library to use the related functionalities of your board and the MadBoard library to use the corresponding pin id.
let pin = AnalogIn(Id.A0)
The potentiometer connects to pin A0, so you initialize it before using the pin.
let value = pin.readVoltage()
The method .readVoltage() returns directly the voltage value. The return value is a floating-point number between 0V-3.3V.
print(value)
Print the result directly to the serial port. You can view the results on the serial monitor.
Reference
AnalogIn - read the voltage from an analog pin.
-
init(_:)- initialize an analog input pin. You need to tell the id of a specified pin to initialize it. -
readVoltage()- read the input voltage from a pin. It will return a float between 0 and 3.3.
MadBoard - find the corresponding pin id of your board.