Brightness control
In this example, you will use a potentiometer as a LED brightness control. As you rotate the potentiometer, the brightness changes.
What you need
- SwiftIO Micro (or SwiftIO board)
- Breadboard
- Potentiometer
- LED
- 330ohm resistor
- Jumper wires
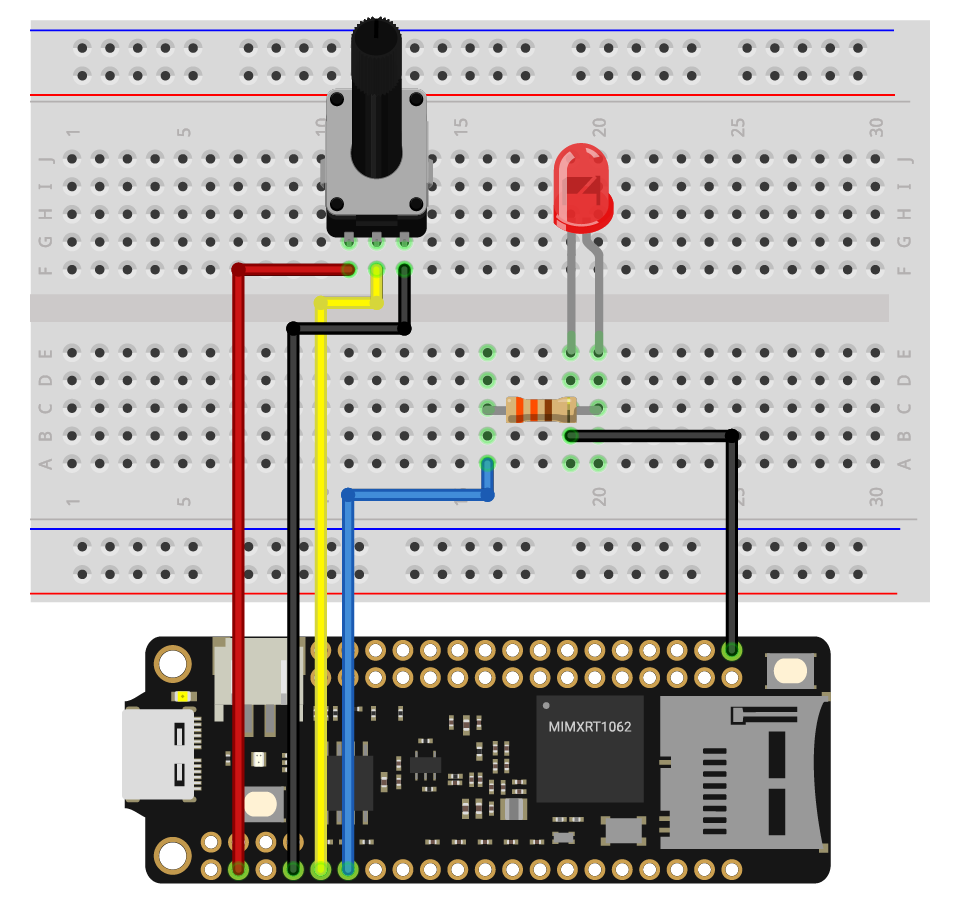
Circuit
- Place the potentiometer onto the breadboard. Connect the legs on the left to pin 3V3, connect the second leg to pin A0, and the third leg to pin GND.
- Place the LED onto the breadboard. The long leg (anode) of the LED goes to PWM0A through a resistor. The short leg (cathode) connects to GND.
Example code
Open the project BrightnessControl in the folder MadExamples/Examples/SimpleIO if you downloaded the examples.
BrightnessControl.swift
// Read the analog input value and use it to set the PWM output in order to change the LED brightness.

// Import the library to enable the relevant classes and functions.
import SwiftIO
import MadBoard

@main
public struct BrightnessControl {
    public static func main() {
        // Initialize an analog input and a digital output pin that the components are connected to.
        let sensor = AnalogIn(Id.A0)
        let led = PWMOut(Id.PWM0A)

        // Allow the LED brightness control all the time.
        while true {
            // Read the input voltage in percentage.
            let value = sensor.readPercentage()
            // Light the LED by setting the duty cycle.
            led.setDutycycle(value)
            // Keep the current LED state for 200 milliseconds.
            sleep(ms: 200)
        }
    }
}
Code analysis
let value = sensor.readPercentage()
There are three available methods to get analog values in different forms. In this case, you will need .readPercentage. It will return a percentage representing the ratio between actual voltage and reference voltage (3.3V). The value can then be used as duty cycle to set the LED brightness.
Reference
DigitalOut - set whether the pin outputs a high or low voltage.
AnalogIn - read the voltage from an analog pin.
MadBoard - find the corresponding pin id of your board.