Read digital input
In this example, let's try to read digital signals using a pushbutton. When you press or release the button, the input value will change accordingly, either true or false. You can see the result on a serial monitor.
What you need
- SwiftIO Micro (or SwiftIO board)
- Breadboard
- Button
- Jumper wires
Circuit
In a breadboard, the holes beside the blue horizontal line are all connected. They are for ground. The holes beside the red line are similar and connect to power. In the middle, there are 30 rows. The holes A, B, C, D, E in the same row are connected internally. So do the holes F, G, H, I, J.
Now let's build the circuit.
- Plug the button into the breadboard. Make sure the button is not in the wrong direction.
- Connect one leg on one side to the pin 3V3.
- Connect one leg on the other side to pin D0.
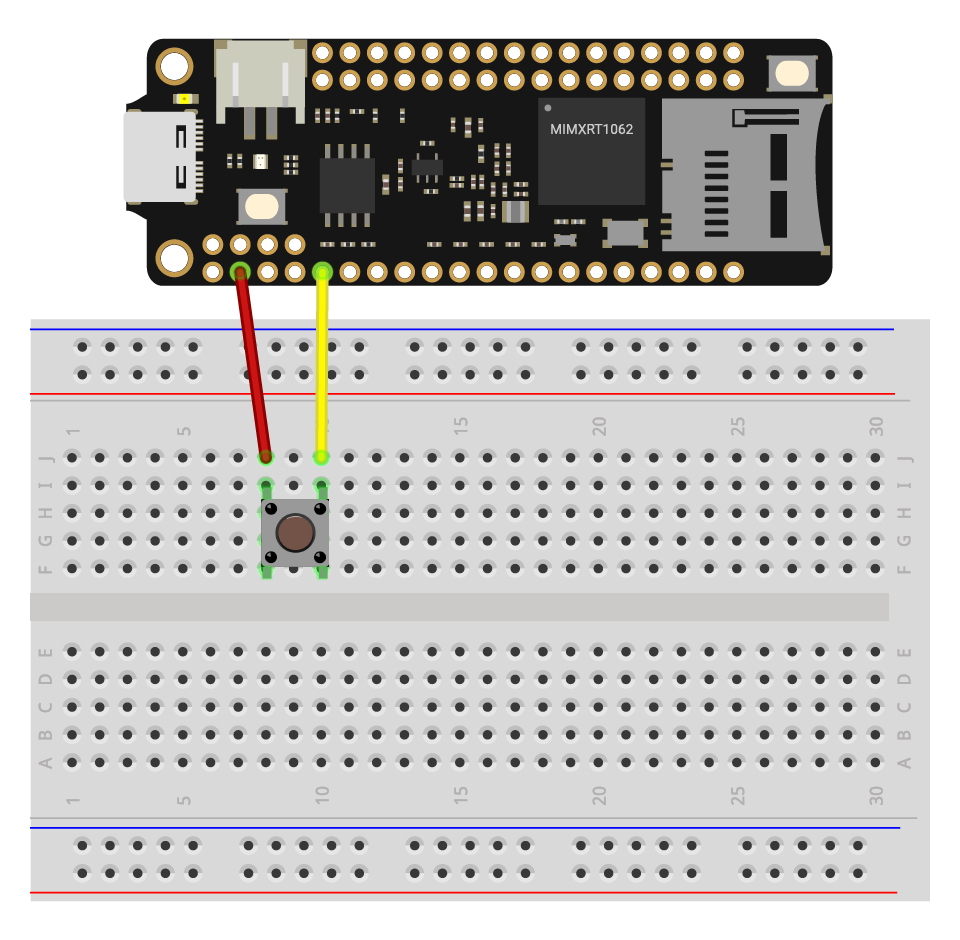
You can notice the wires are in different colors. Usually, red is for wires connected to power and black is for ground.
Example code
Open the project ReadDigitalInput in the folder MadExamples/Examples/GettingStarted if you downloaded the folder.
// Read the input voltage on a specified digital pin. The value you get will be either true or false.

// Import the library to enable the relevant classes and functions.
import SwiftIO
import MadBoard

@main
public struct ReadDigitalInput {
    public static func main() {
        // Initialize the pin D0 as a digital input pin.
        let pin = DigitalIn(Id.D0)

        // read the input every second.
        while true {
            // Declare a constant to store the value you read from the digital pin.
            let value = pin.read()
            // Print the value and you can see it in the serial monitor.
            print(value)
            // Wait a second and then continue to read.
            sleep(ms: 1000)
        }
    }
}
Background
Button
The button, or pushbutton, is always used to control other devices. You can see it in a light switch, remote control, etc. This button is momentary, so its state will only change as you press it. Once you release it, it will go back to its original state.
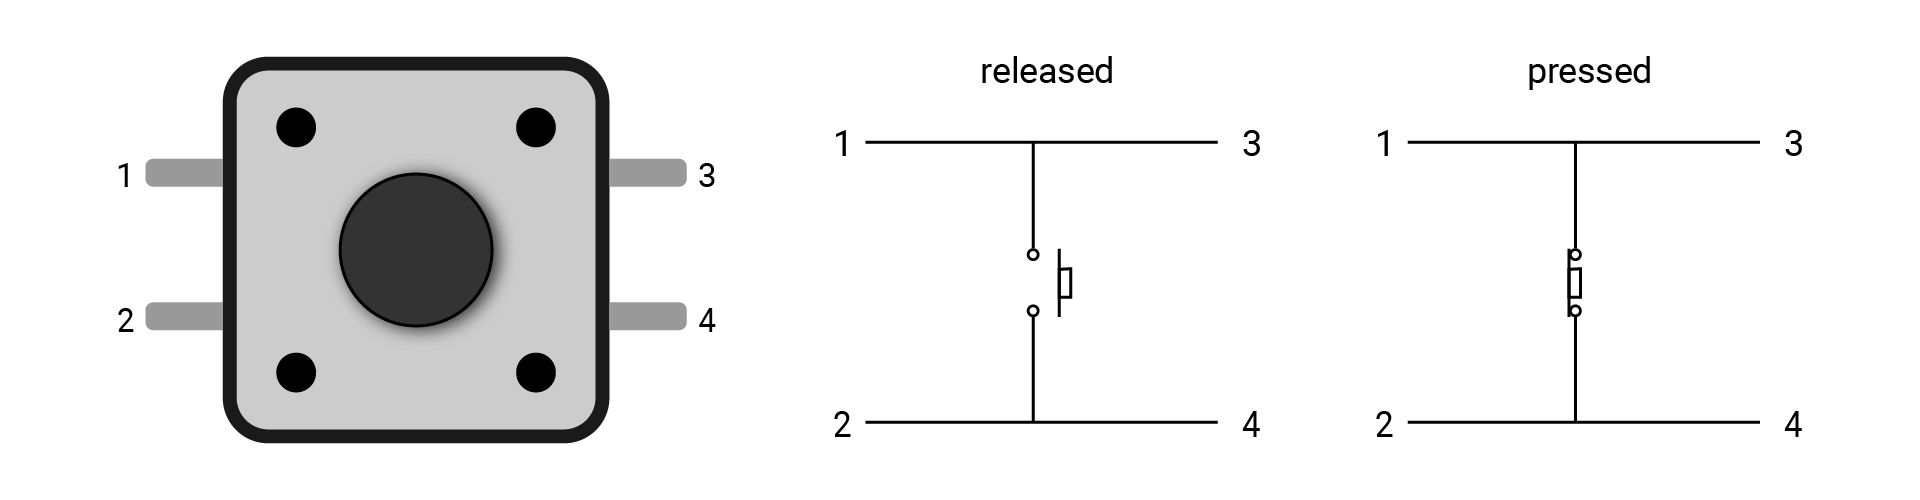
This kind of button usually has four legs. Every two legs are shorted, like 1 and 3, 2 and 4.
If you connect both 1 and 3 to your circuit, the current can flow through it all the time, thus the button cannot control any other components.
It's a good idea to connect the two legs on a diagonal line in the circuit, like 1 and 4, 2 and 3.
Code analysis
import SwiftIO
import MadBoard
SwiftIO consists of all the functionalities to control your board. All programs must first reference it to use everything in it, like classes and functions.
MadBoard defines the corresponding pin id of the different boards.
let pin = DigitalIn(Id.D0)
The button is connected to pin D0. A digital pin can be used as either input or output. Here the pin serves as the input, so you need the class DigitalIn.
let value = pin.read()
The method read() allows you to get the input value, either true or false, representing high and low levels respectively. In this way, you can know the states of the button according to the values.
- If you press the button, the pin connects to 3V3, so the value will be
true. - Once you release the button, the input value will be
false.
print(value)
The function print() is used to print the values out. You can view them on a serial monitor by connecting the serial port to your computer. Here is a guide to tell you how to open the serial monitor.
Reference
DigitalIn - read the input value from a digital pin.
-
init(_:mode:)- initialize the digital input pin. It requires the pin id. You can refer to the correspondingIdenumeration. The parameter mode already has a default value. -
read()- read values from a input pin. It will return a boolean value.truecorresponds to a high level, andfalsecorresponds to a low level.
print() - print the values out.
MadBoard - find the corresponding pin id of your board.