Debounce
In the previous example, you create a light switch using a button. However, you may notice that when you press or release the button slowly, the LED doesn't respond as expected. For example, it may turn on and off several times with just one press. So this example demonstrates how to deal with this problem.
What you need
- SwiftIO Micro (or SwiftIO board)
- Breadboard
- Button
- Jumper wires
Circuit
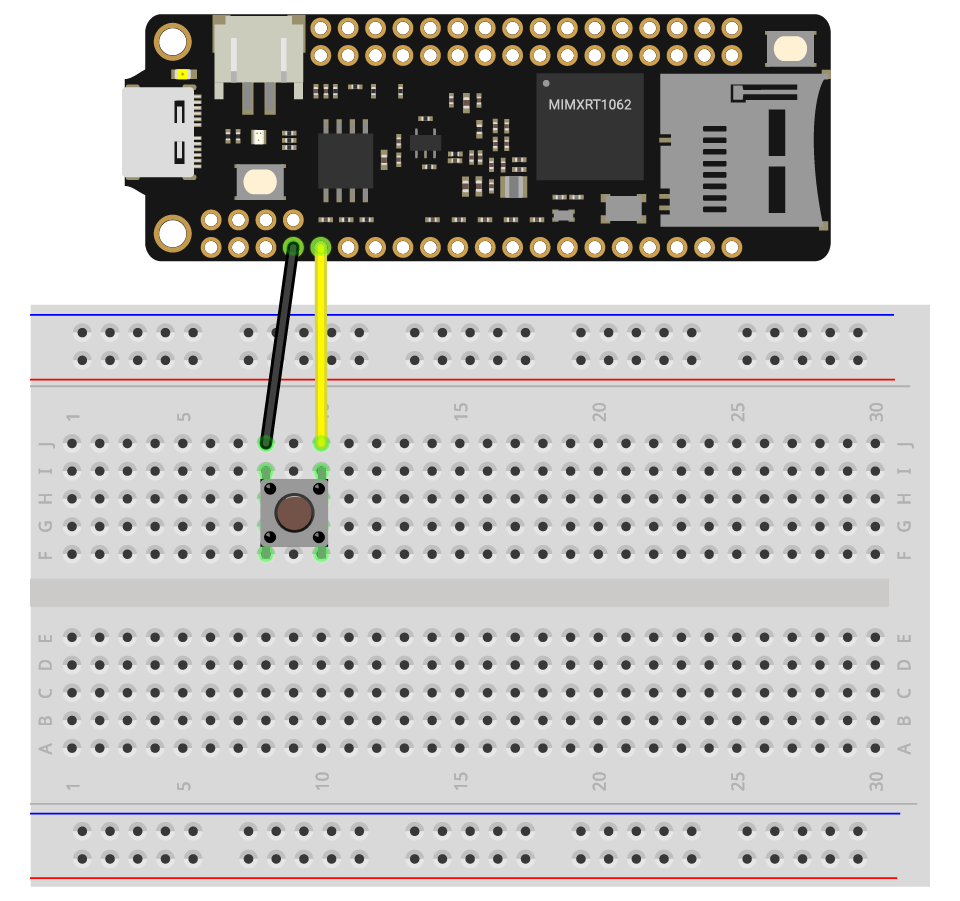
- Plug the button on the breadboard.
- Connect one leg on the left to the pin GND. Connect the other on the right to the pin D0.
Example code
Open the project Debounce in the folder MadExamples/Examples/SimpleIO if you downloaded the examples.
// Check if the button is pressed using a debounce method.

// Import the library to enable the relevant classes and functions.
import SwiftIO
import MadBoard

@main
public struct Debounce {
    public static func main() {
        // Initialize the red onboard LED.
        let red = DigitalOut(Id.RED)

        // Initialize a digital input pin D0 that the button is connected to.
        let button = DigitalIn(Id.D0, mode: .pullUp)

        // Declare the values in order to record and judge the button state.
        var count = 0
        var triggered = false

        while true {
            // Read from the input pin.
            let value = button.read()

            // Ignore the change due to the noise.
            if value == false {
                count += 1
            } else {
                count = 0
                triggered = false
            }

            // Wait a certain period to check if the button is indeed pressed.
            // Toggle the LED and then reset the value for next press.
            if count > 50 && !triggered {
                red.toggle()
                triggered = true
                count = 0
            }

            // Wait a millisecond and then read to ensure the current state last for enough time.
            sleep(ms: 1)
        }
    }
}
Background
Debounce
When you press or release the button, you may think the button will immediately come to a stable state, closed or open.
However, there will be several bounces inside the button before it finally comes to a stable state. That's because of its mechanical structure. Once pressed, the connection inside it will change several times between two states: establish the connection and disconnect the circuit until the button comes to a perfect connection. The button bounce isn't visible to your eye, but you can observe it in the oscilloscope.
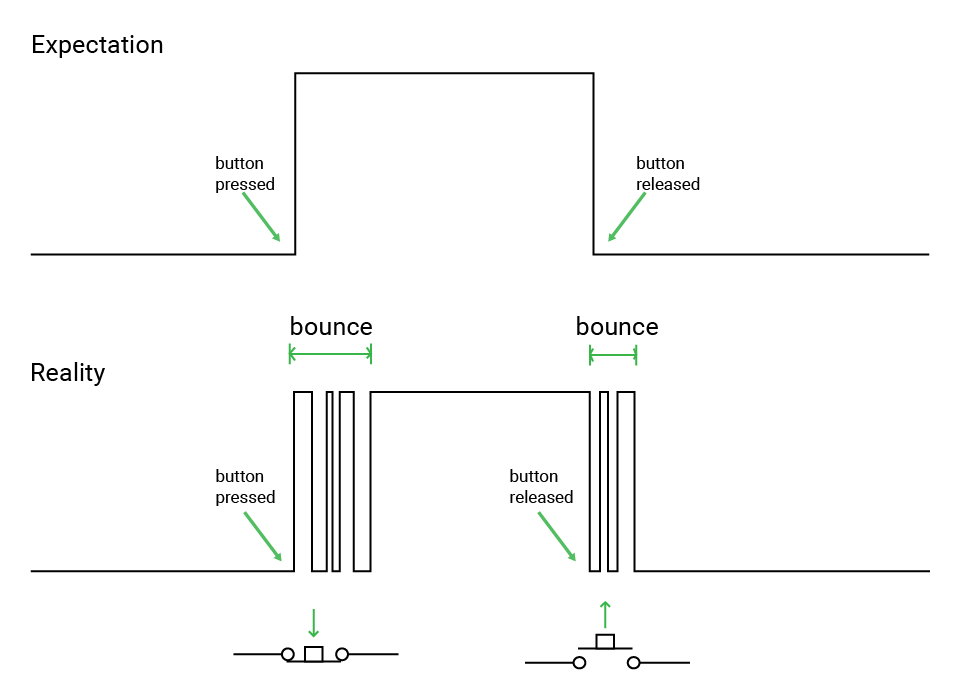
If you directly determine the button state according to input values, these noises may be regarded as multiple presses. So you will need a debounce method.
There are many methods, including hardware and software debounce.
- The hardware solution is to perfect the circuit to eliminate this problem. For example, add a capacitor to smooth the signal and filter instant changes.
- And you will use the software debounce, which lies in checking twice in a short time to make sure the button is closed or open.
Pull-up and pull-down resistor
As you have known, the input will always be either high or low. But if the input pin connects to nothing, what will the input value be? High or low?
That is hard to say. The state of that pin will be uncertain. It will change randomly between high and low states, which is called floating. So a pull-up or pull-down resistor is needed to ensure a stable state.
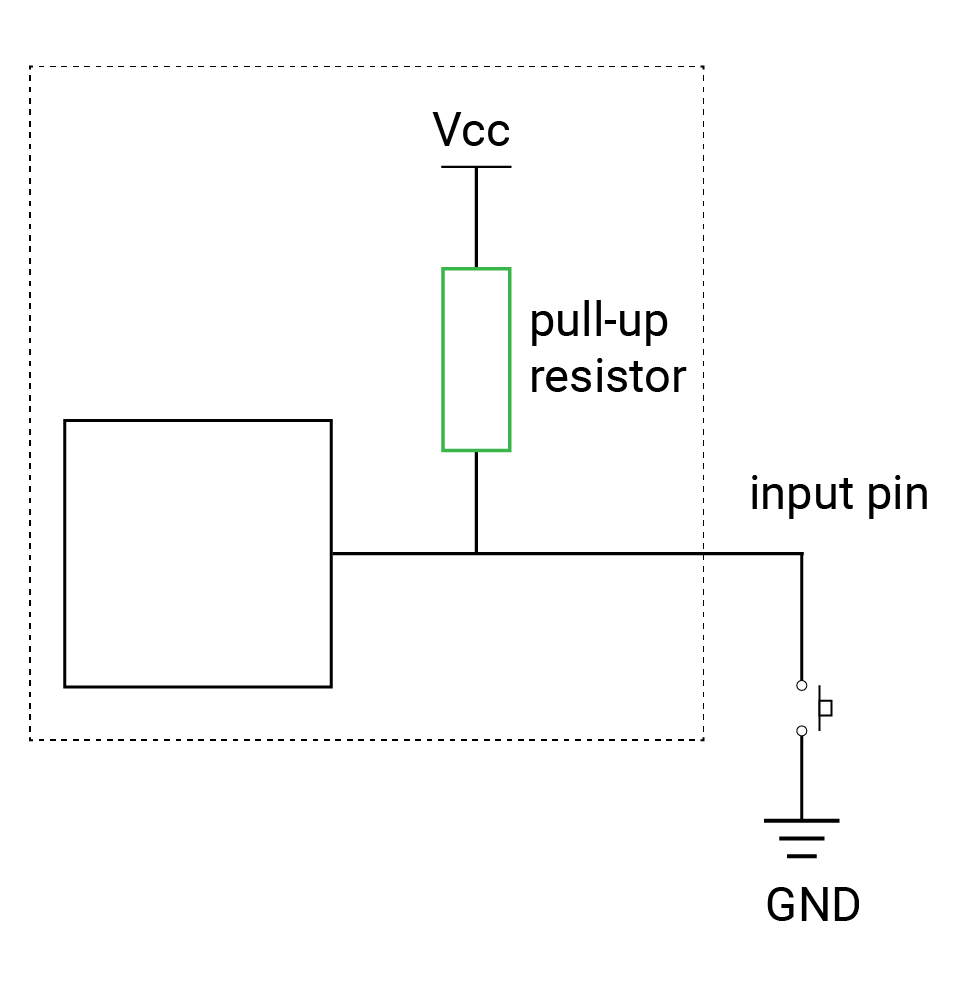
Pull-up resistor
A pull-up resistor connects the pin to power. In this case, the button should connect to the input pin and ground.
By default, when the button is not pressed, the current flows from power to the input pin. So it reads high level. If the button is pressed, the current flows from power directly to the ground. Thus the pin reads low level.
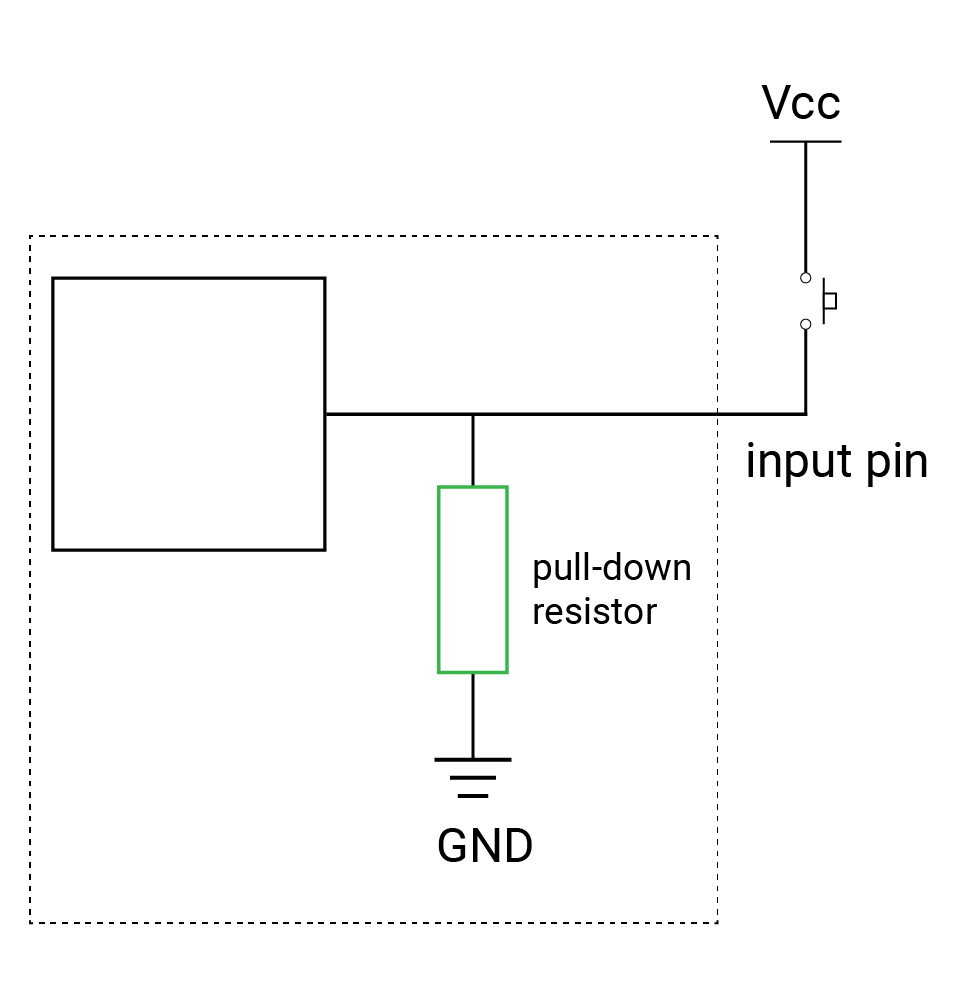
Pull-down resistor
A pull-down resistor connects the pin to the ground. If so, the button should connect to the power and input pin.
By default, the pin connects directly to the ground, so the pin keeps in a low state. And if you press the button, the current flows from power to the input pin, and the pin reads high level.
You usually need them when you use a button. On this board, there are already internal pull-up and pull-down resistors. By default, the pull-down resistor is connected. You can also change it when initializing the pin.
Code analysis
let button = DigitalIn(Id.D0, mode: .pullUp)
Initialize the digital input pin. The default mode is pullDown. And you will use the pull-up resistor here, so the mode is set to pullUp. In this mode, the pin reads low when you press the button, and the onboard LEDs need low voltage to turn on, so it's more straightforward.
Of course, you can keep the default mode, and you will need to change the circuit and code accordingly.
var count = 0
var triggered = false

if value == false {
    count += 1
} else {
    count = 0
    triggered = false
}

if count > 50 && !triggered {
    red.toggle()
    triggered = true
    count = 0
}

sleep(ms: 1)
These lines of code can eliminate the noises from the button. You can look at the image below to have a better understanding.
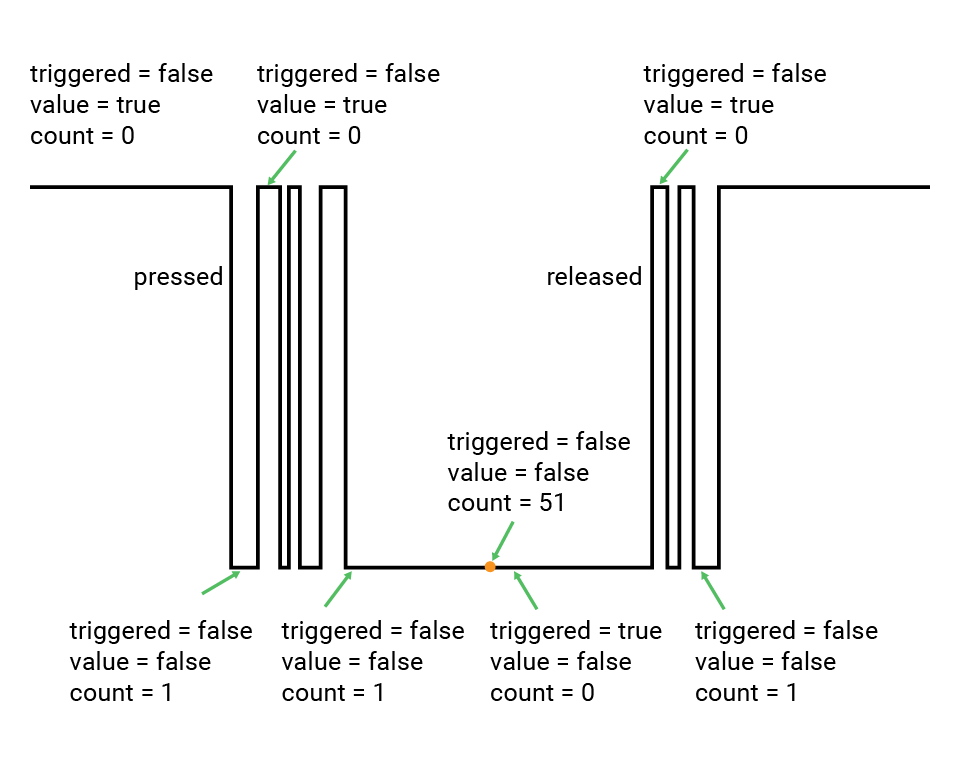
When the value is false, there are two cases: the button is pressed or it's the noise signal. The noise usually doesn't last long. When the low level lasts for a period, you can be sure the button is pressed.
The variable count is used to store the time. Your board does calculations extremely quickly, so you can ignore it. And the period is about 50ms here. At that time, the LED turns on.
Reference
DigitalOut - set whether the pin outputs a high or low voltage.
DigitalIn - read the input value from a digital pin.
MadBoard - find the corresponding pin id of your board.