PWM melody
This example is similar to the previous one. You will make the buzzer to play a small piece of music.
What you need
- SwiftIO Micro (or SwiftIO board)
- Breadboard
- Buzzer
- Jumper wires
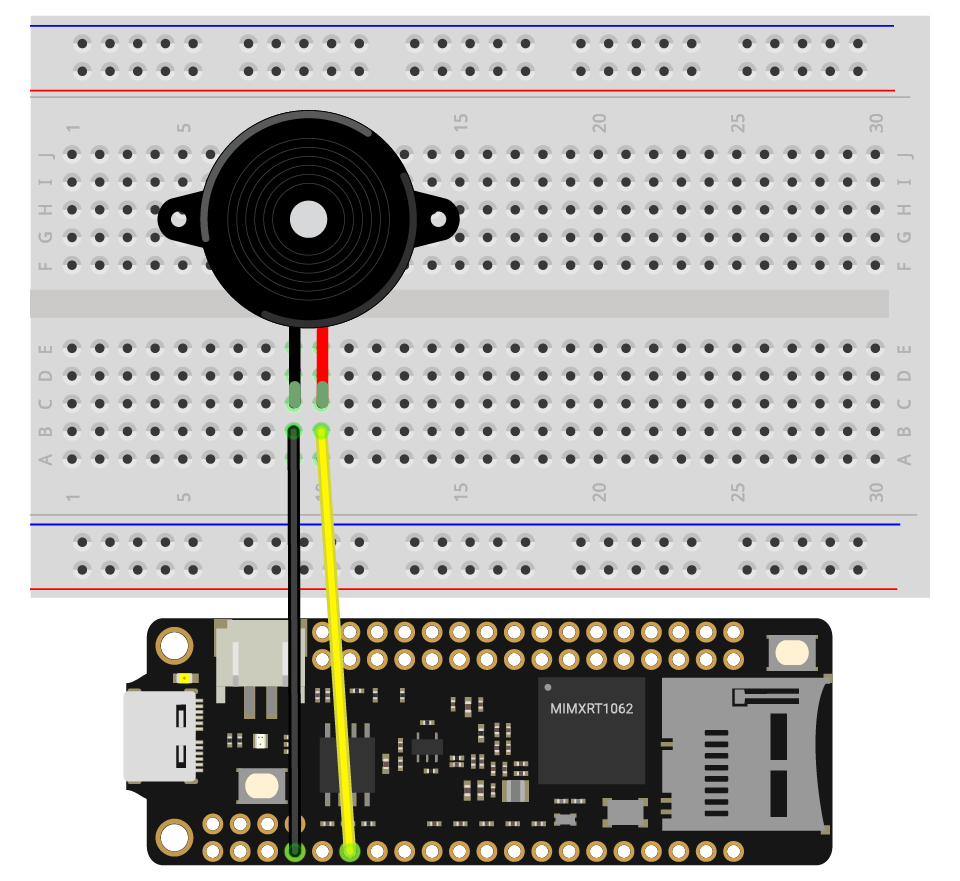
Circuit
- Plug the buzzer onto the breadboard.
- Connect any one leg to the pin GND and the other to the pin PWM0A.
Example code
Open the project PWMMelody in the folder MadExamples/Examples/SimpleIO if you downloaded the examples.
PWMMelody.swift
// Enable the speaker to play a simple melody by changing the frequency of PWM output.

// Import the library to enable the relevant classes and functions.
import SwiftIO
import MadBoard

@main
public struct PWMMelody {
    public static func main() {
        // Initialize a PWM output pin that the speaker is connected to.
        let speaker = PWMOut(Id.PWM0A)

        // Specify several frequencies corresponding to each note of the melody.
        let frequencies = [
            330, 330, 349, 392,
            392, 349, 330, 294,
            262, 262, 294, 330,
            330, 294, 294
        ]

        // Allow the speaker to repeat the melody again and again.
        while true {
            for f in frequencies {
                // Change the frequency and the duty cycle of output to produce each note.
                speaker.set(frequency: f, dutycycle: 0.5)
                sleep(ms: 250)
            }
        }
    }
}
Code analysis
let frequencies = [
    330, 330, 349, 392,
    392, 349, 330, 294,
    262, 262, 294, 330,
    330, 294, 294
]
The frequencies on the array correspond to the notes of the music. If you want to play other music, you can replace the frequencies according to the music score.
Reference
PWMOut - set the PWM signal.
MadBoard - find the corresponding pin id of your board.